BACK
Valve Stem Seal Replacement
Written by: t_cel_t
First of all disconnect your battery, remove intake/intercooler if it coves the valve cover. Then, remove the upper timing belt cover.

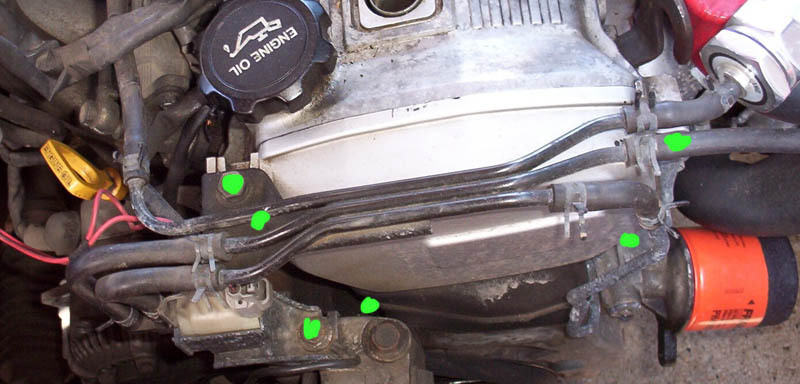
Remove these nuts and pry up and off the valve cover.
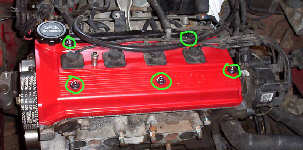
Take out these 2 bolts and pull the distributor strait out.
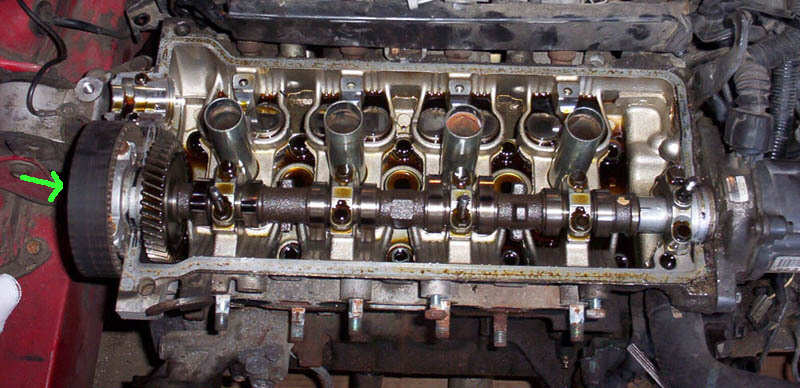
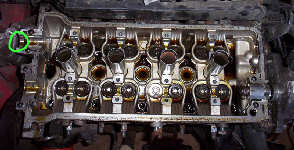
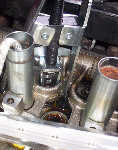
You will now see this. Sorry, I already took out the intake cam.
Now you can take the timing belt pulley off the exhaust cam. Just take the bolt out and wiggle the gear and it will come off. Just kind of let it go limp and stay there. That way the timing wont be off when you put it back on.

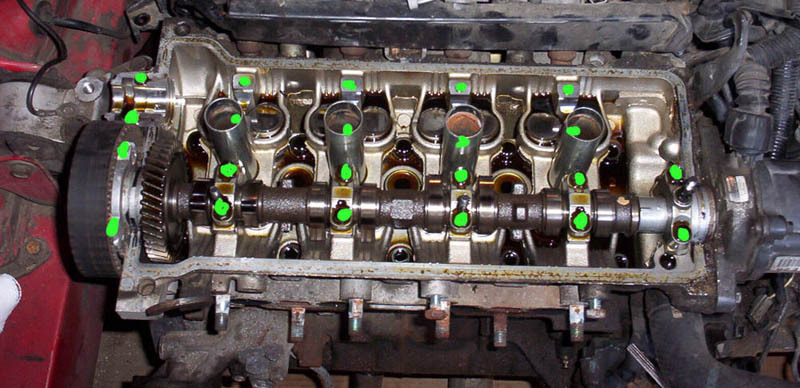
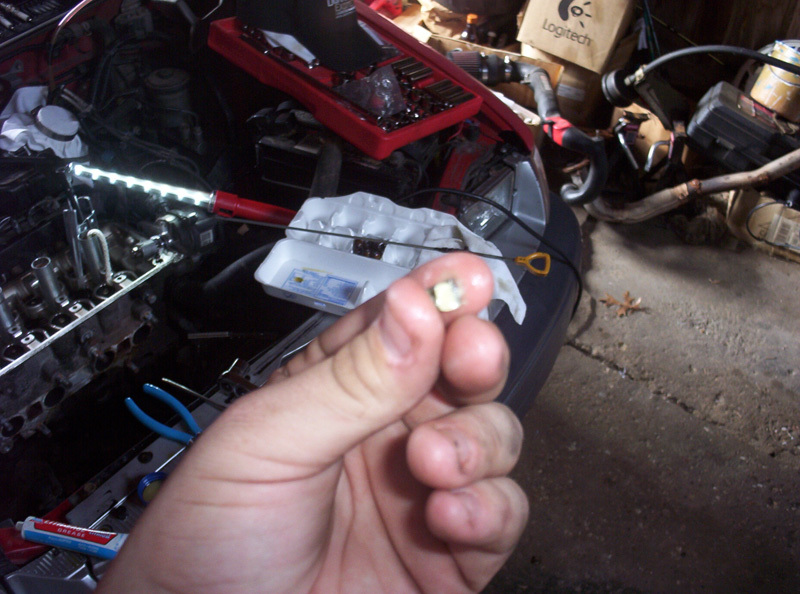
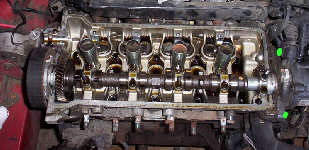
Now you can take out the cams. Loosen the bolts gradually and uniformly so as to keep the cam parallel to the head (remember this for reassembly as well). Then you can just pull the bearing caps off. Put the caps in a place where they will stay in order. I used an egg carton for each cam. Here are the position of all the bolts.

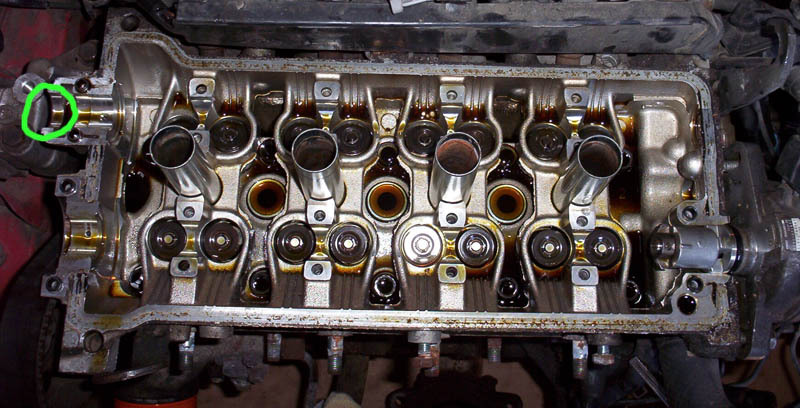
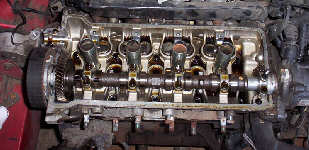
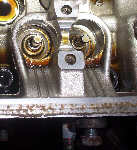
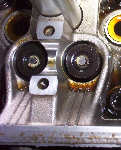
Now that all the bearing caps are off you can lift the cams out. NOTE: LIFT THEM STRAIGHT OUT. You should now see this. Also, note the circled area where a cam seal will be.
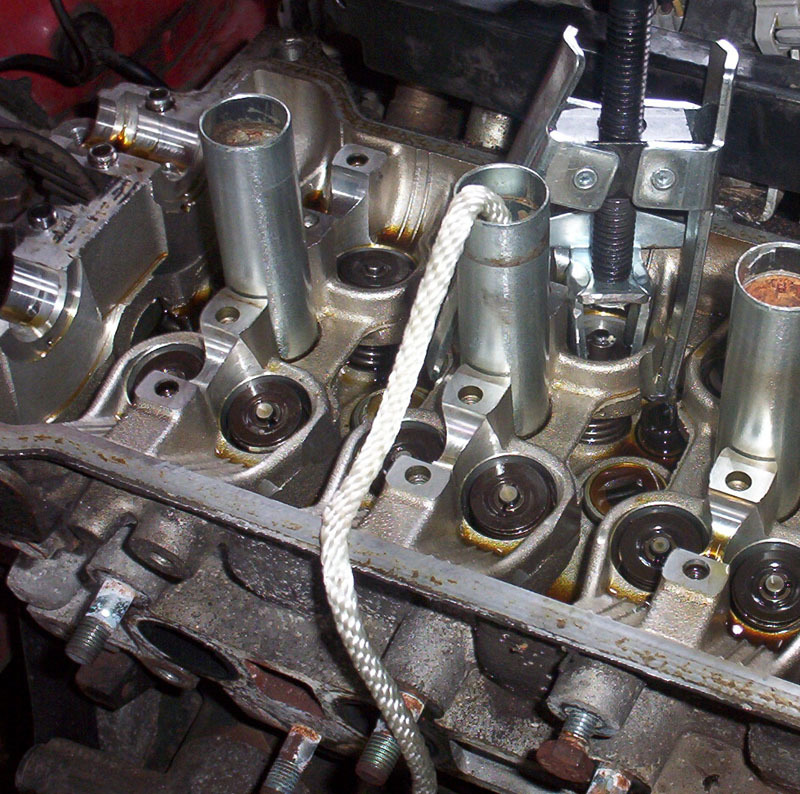
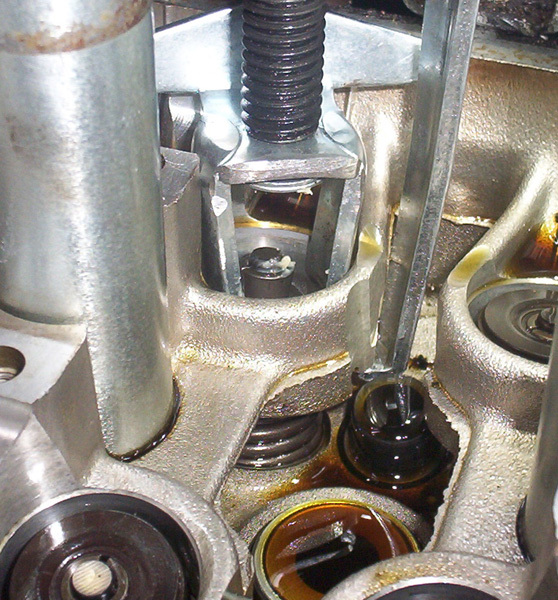
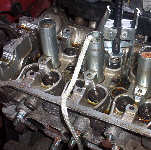
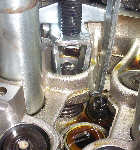
Now, take out the sparkplugs and turn the crankshaft pulley so that the #1 piston is all the way down. You can put a long screwdriver down the hole to tell when it is all the way down. Just make sure that the timing belt doesnt jump any cogs. When the piston is down, start feeding nylon rope into the sparkplug hole untill it is almost full. Then turn the crankshaft pulley clockwise with a ratchet untill it is really tight. You should see somethinglike this (ignore the spring compressor).
Now that you have the valves supported by the rope being compressed in the cylider, you can use a 12mm deep wall socket on an extension (doesn't matter how long), hold it on the valve retainer and tap on it with a hammer. The collets will let loose and the spring will be free. Use a small magent and attatch it to the side of the socket and it will hold the collets to the socket when they come off. Keep the spring, retainer, and 2 collets in order. I put them with the tappets/shims in the egg carton.
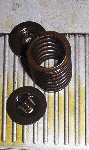
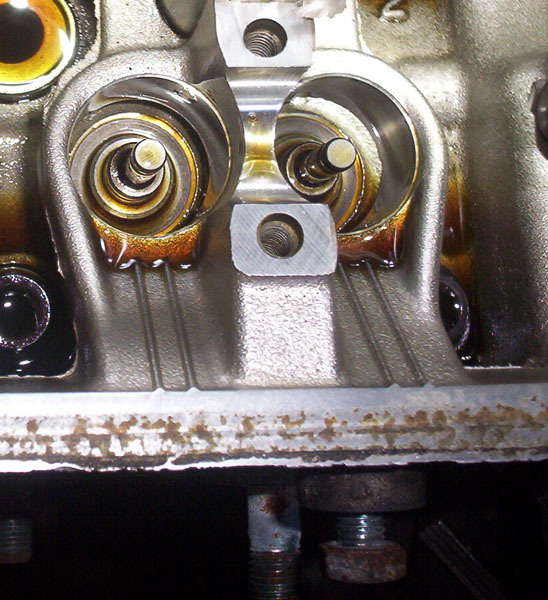
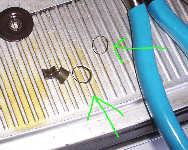
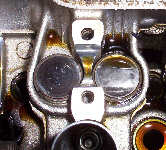
Now that you have just the naked valve stem and the seal at the base of it, you can take your needle nose pliars and grap the old seal and pull it off its seat. Pull straight up. If the pliars comes off the seal, tun your hand 90 degrees and grab the seal again and pull. the first few are hard but then you figure out how to do it. I know there is a tool just for taking the seals out but even at the toyota dealer they looked at me like i was a retard for knowing the facts, so if you can get one the tools all the power to you. Now when you get it off you need to check the seat to make sure it doesnt have any part of the seal still on it, in this pic it shows were the rubber has a habit of breaking off and staying on the seat. the next pic is of the little rings that are left behind, you need to get these off or the new seals might not get seated right. and the last pic is a seat with no seal or residual rubber ring.
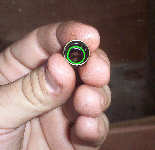
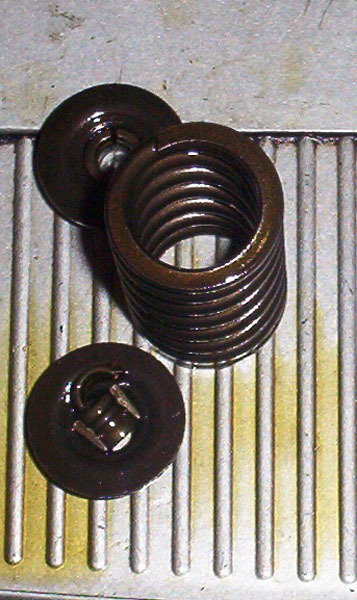
Now it is time to put the new seals on. Some companies and OEM seals are different colors, 1 color for intake and 1 for exhaust valves. Just so you know the exhaust valves are to the front of the car and vice versa. The package should say what color for what valves, mine was black=intake and brown=exhaust. Anyway, now take the new seals, dip them in NEW motor oil and set them on the valve stem. Then use your thumb to push them over the lip and push it down the stem past the retainer notches. Get a deepwall socket, I cant remember what size a used, but use it to push down on the seal untill it seats. You shouls feel a slight click as it snaps on there. DO NOT HAMMER DOWN ON IT OR IT WILL BE JUNK.
Now that the seals are on, we get to start the fun part, putting the springs back on. For most of us, this will cause a LOT of swearing and throwing of tools for the first few, but it gets easier. Now, I got this compressor for like 5 bucks at Autozone. I had to modify it a bit, but it worked ok for the most part. They do make a spring compressor that works slick, but I ain't rich so I can't buy it. Put the spring on the valve, see the retainer on the spring, and use your compressor to compress it. You DID keep all that stuff in order, RIGHT?
When you have the spring compressed take the collets and put a dab of grease on the inside.

Then press them against the stem and they will stick into the notch. I used a needle nose pliars to set them in. Make sure you put them in the right side up. If you do it wrong you will quickly find out when you let the compressor off. Next, slowly release the compressor. Voila, the spring is now captured.
Now, take the bucket tappet THAT YOU KEPT IN ORDER, oil it up a bit, and slide it down onto the spring.
Now, just do this 15 more times. To remove the rope just turn the crank counterclockwise a bit, pull the rope out, and move to the the next cylinder. Now that the first cylinder took you 3 hours, the next 3 will go fast.
After you are all done with the seals, reinstall the cams, and cam bearing caps and torque them down gradually and uniformly to 115 in/lbs. The cams have little dots on the gears that need to be ligned up. Then, the timing belt pulley can be put back on. Line up the '5E' or '4E' hole (depending on which engine you have) with the dot on the head, and make sure the #1 piston is at TDC. Then, just put the valve cover, distributor, timing covers, and vaccum block/boost controller back on.
BACK