Here I will document the progress made on the central gauge pods. Everything will be listed in reverse order so the newest news is always at the top.
9/21/06
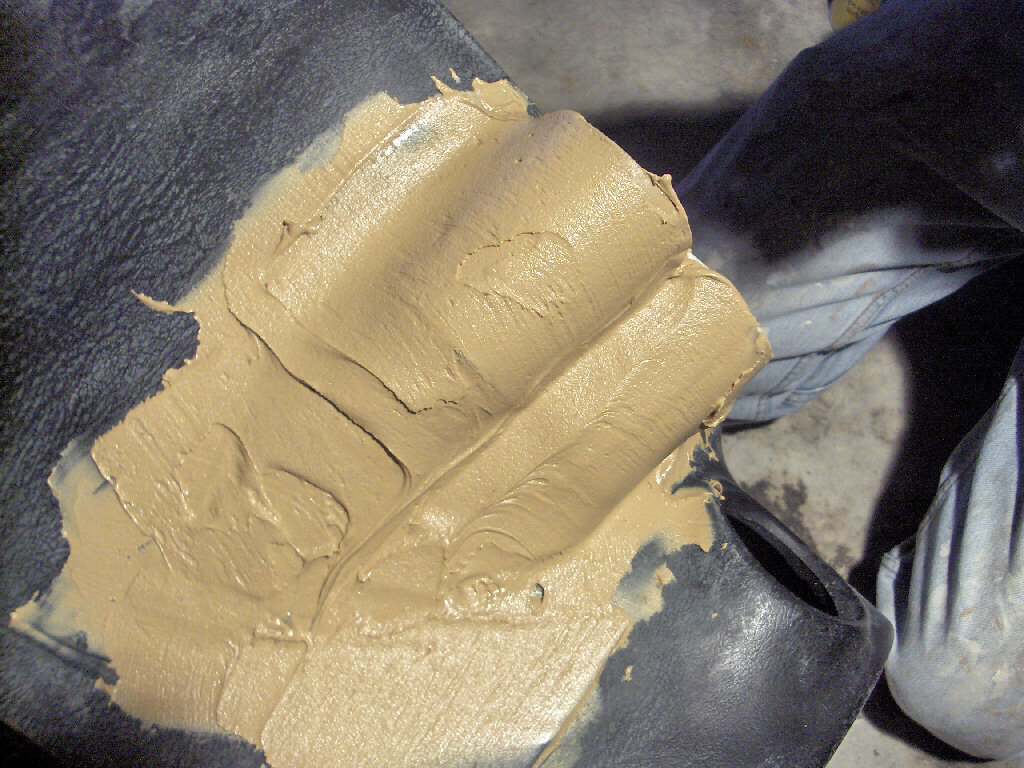
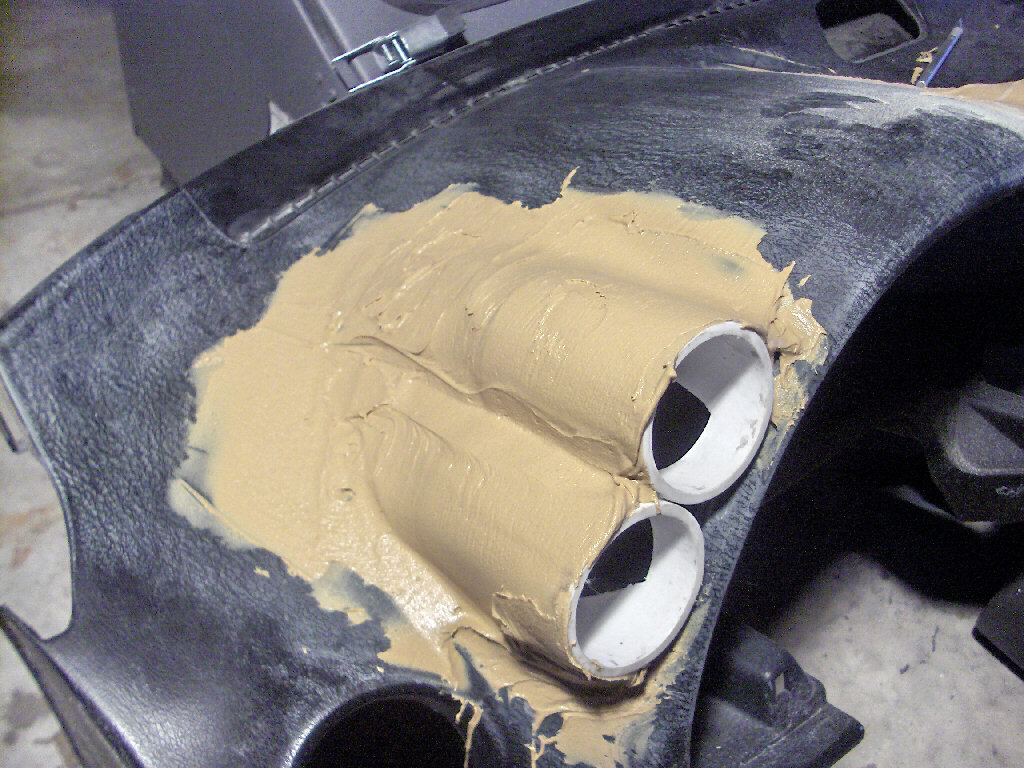
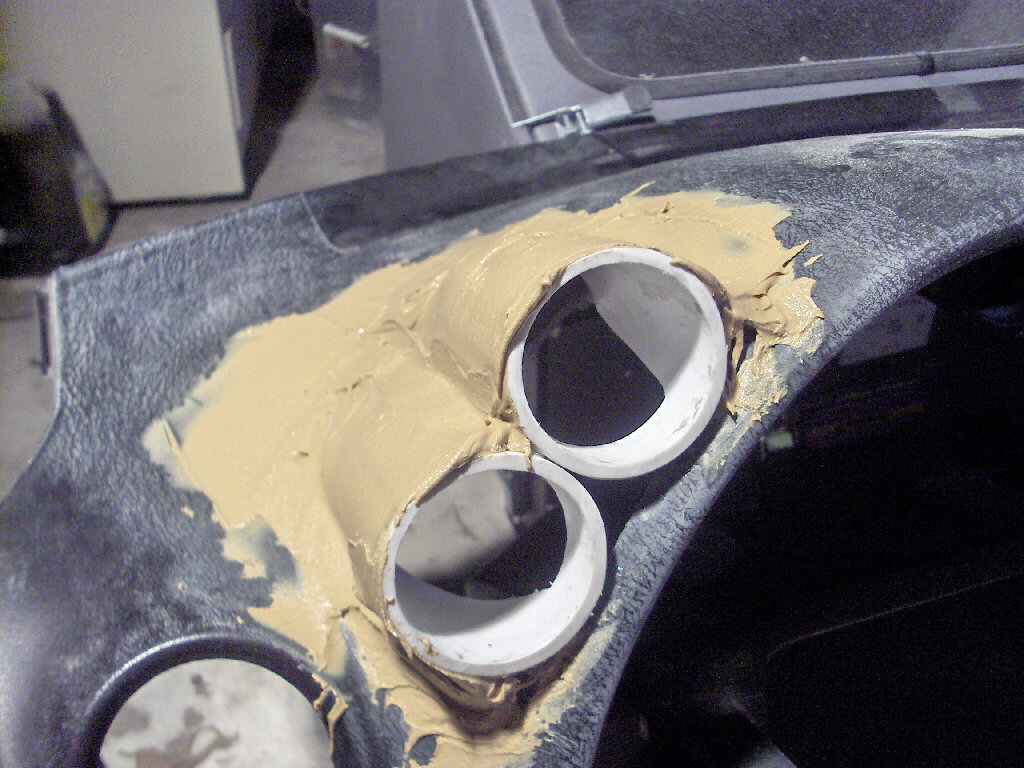
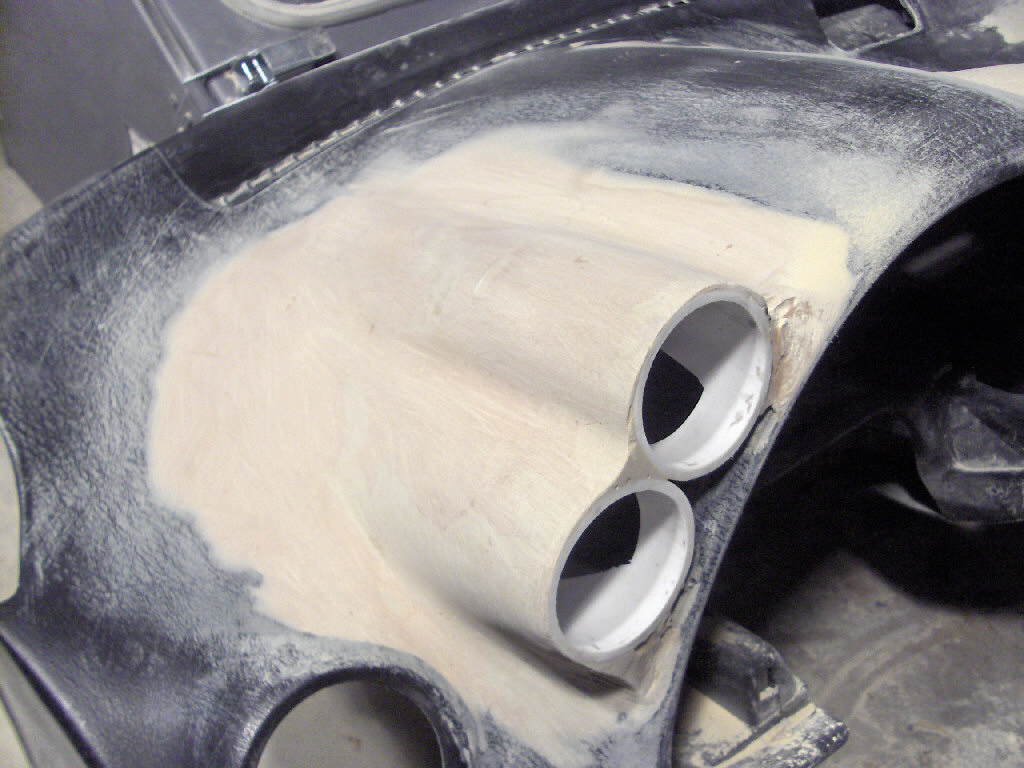
So my cousin calles me up last night on my way out of work and asks if I want to do more work on the gauges. I of course say yes! So, last night was the night to start the body filler work. I must say things went pretty well. We sanded down the rough spots in the fiberglass and smoothed out the edges a little bit. Then we mixed up the body filler and went to work. I'm very thankful I had my cousin over who has done body work to help me out (in fact hes been helping me the entire time). Here are pictures of the first coat. He did the right side that looks all nice, I did the left.
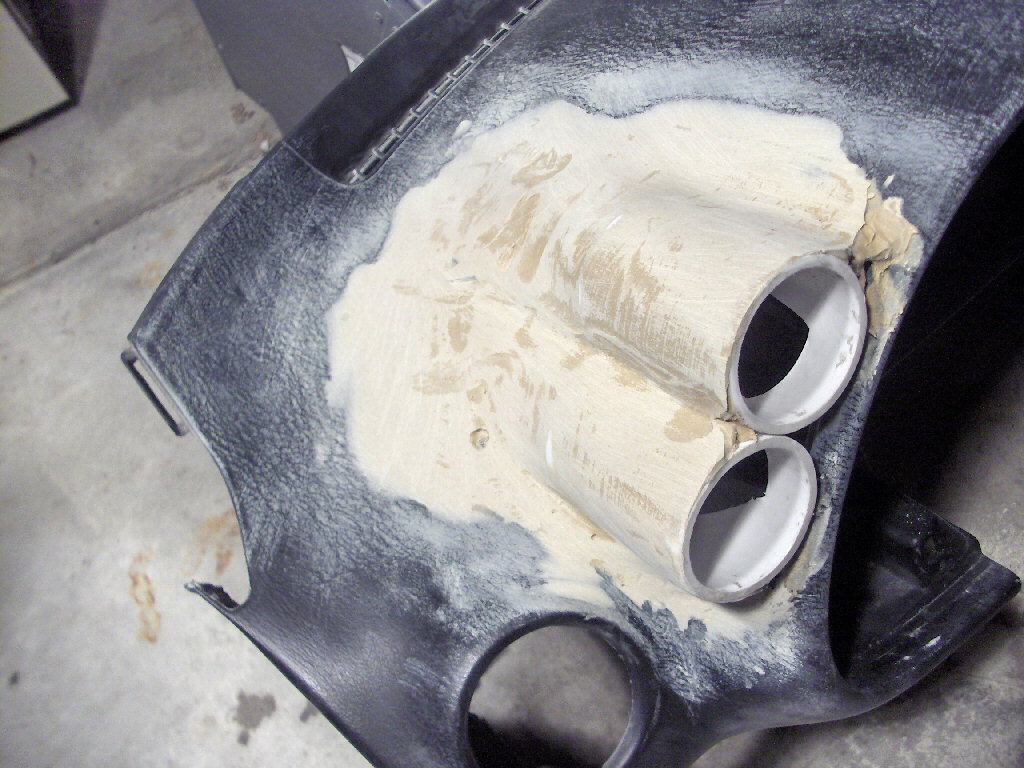
Of course I think you know what comes next. Thats right, sanding. Then theres more sanding. And, after that, more sanding again. This being a free form project we just started forming it. There was a lot of forming to be done. Here are pictures of it once it was sanded down.
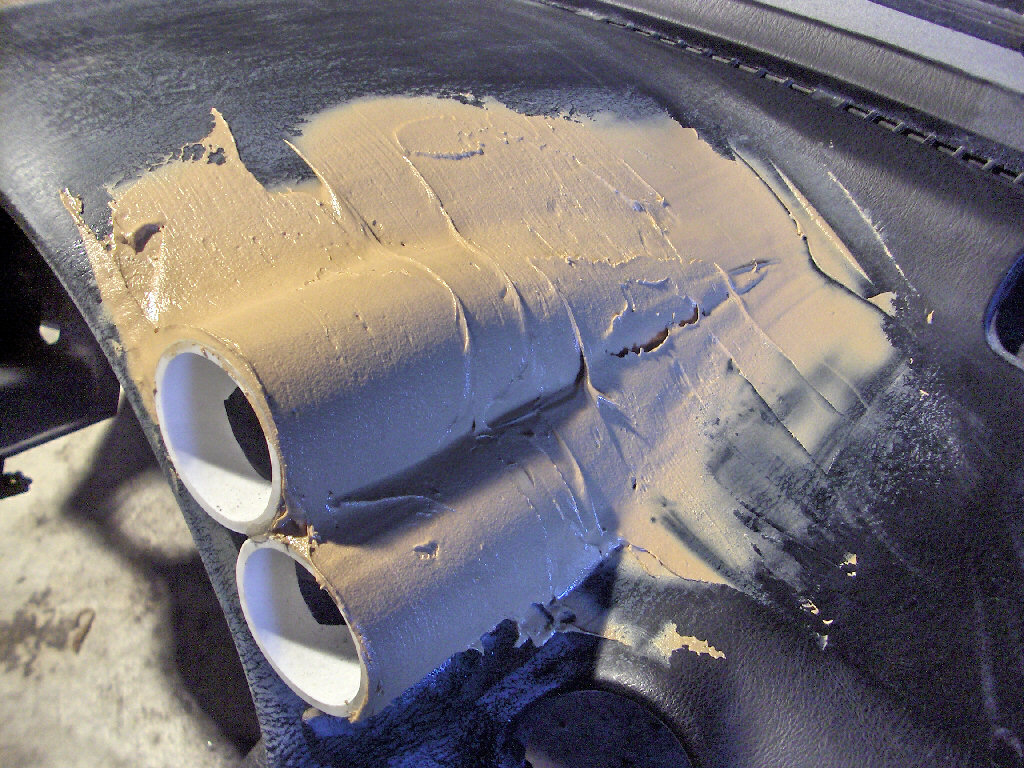
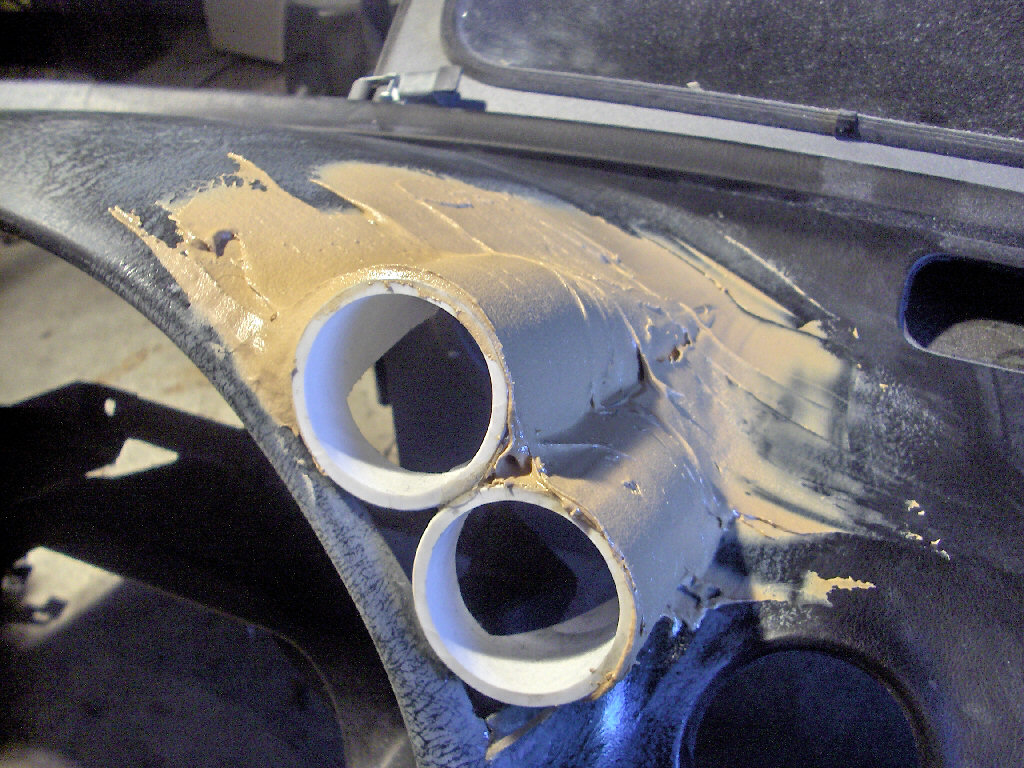
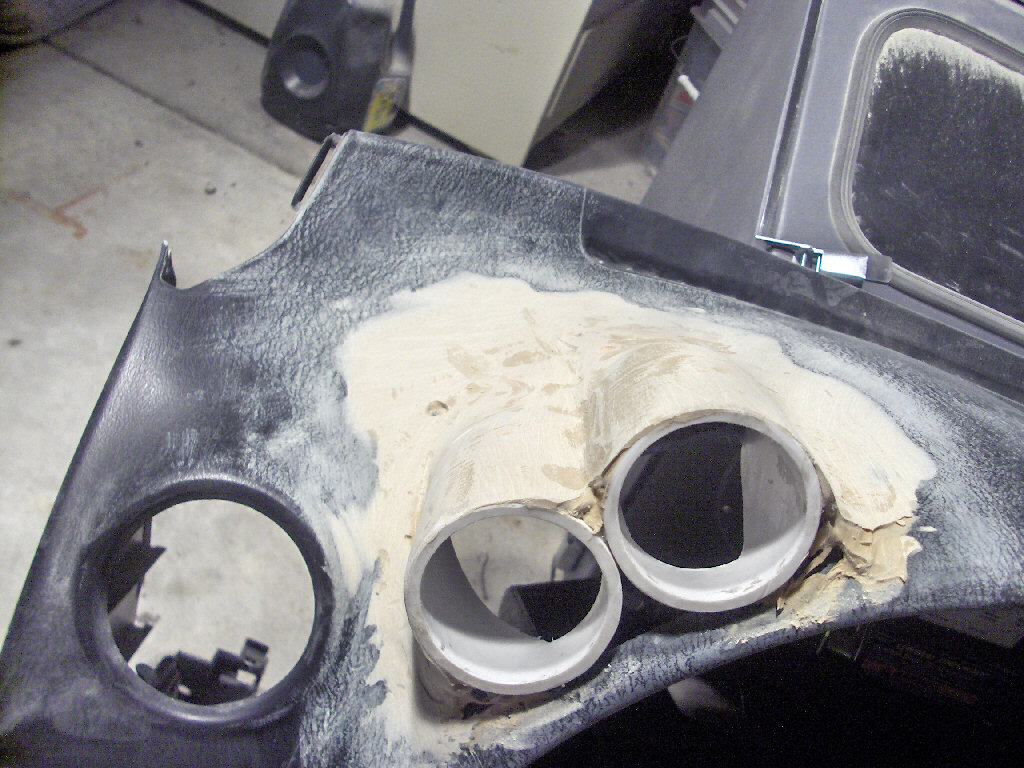
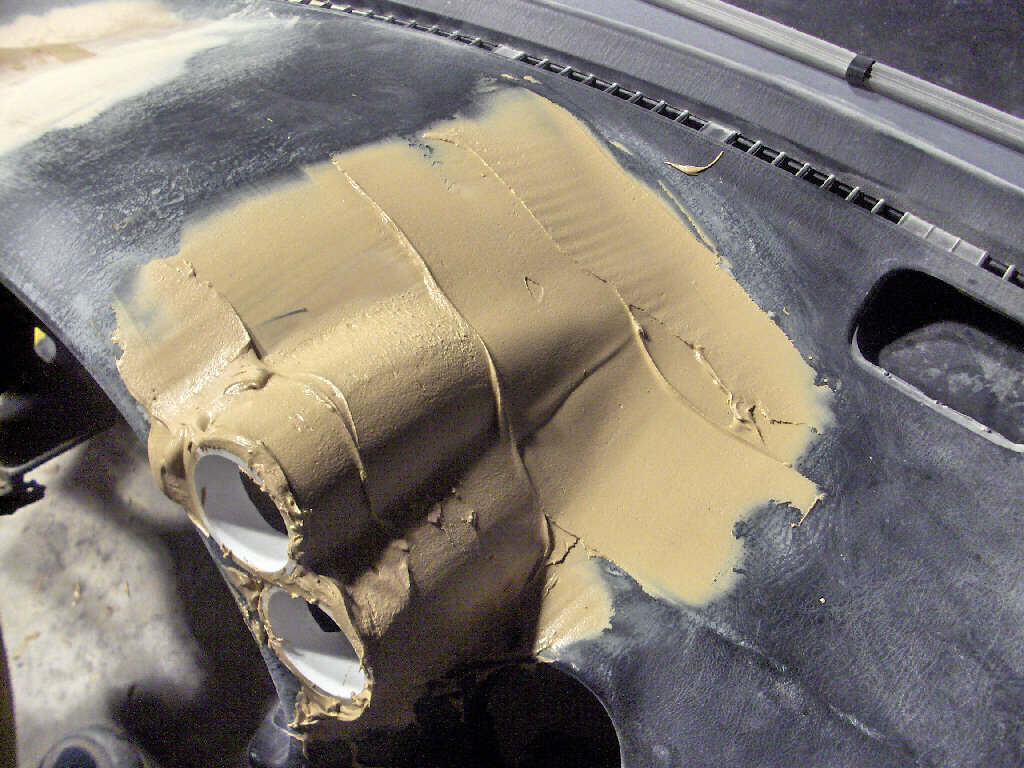
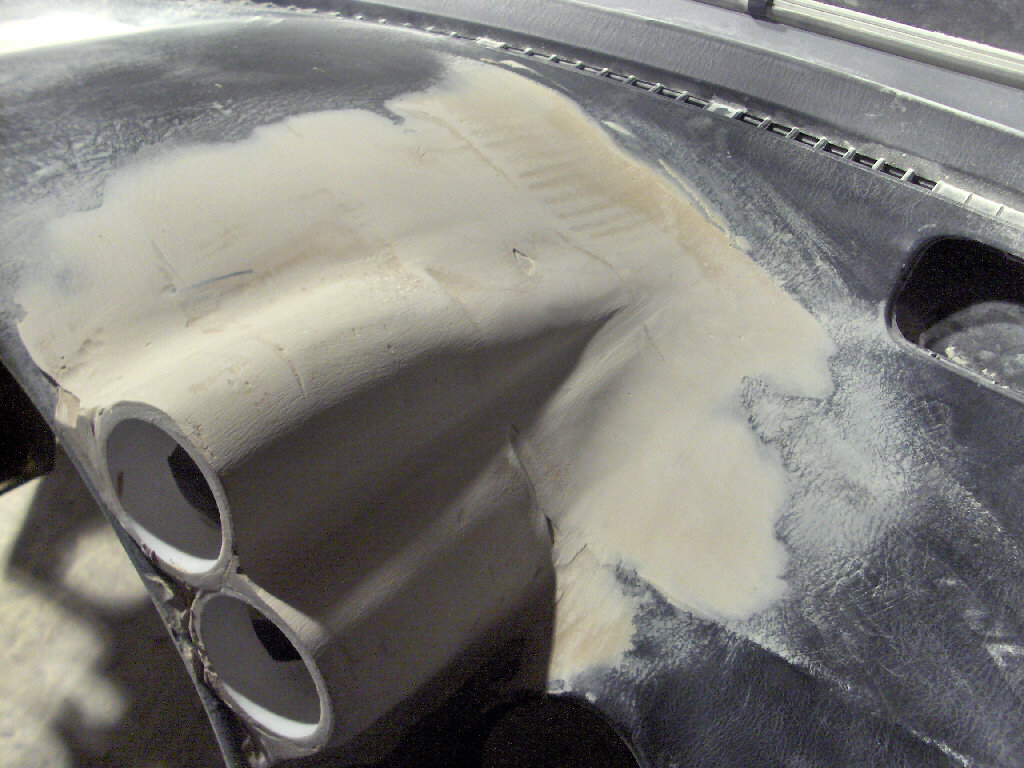
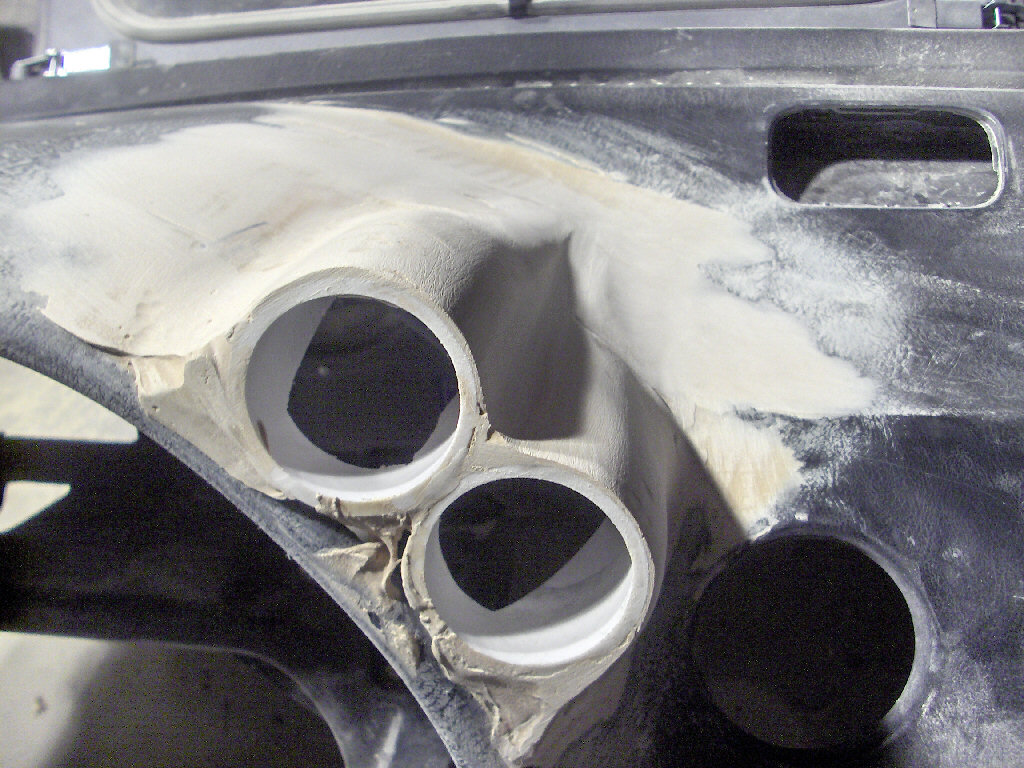
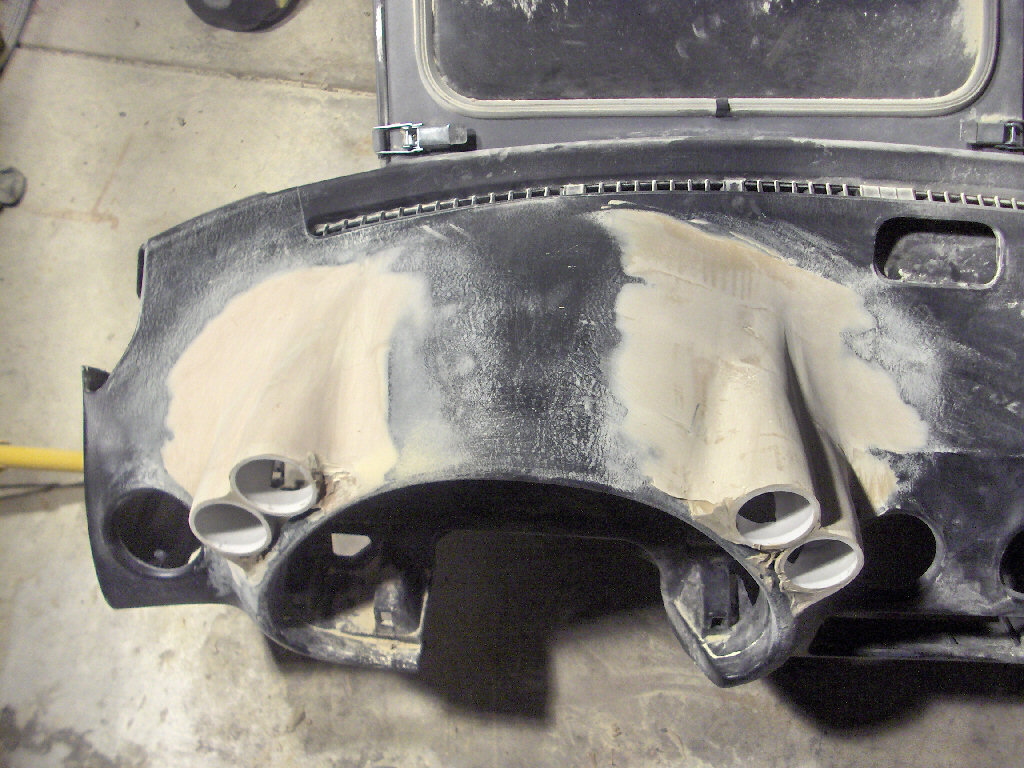
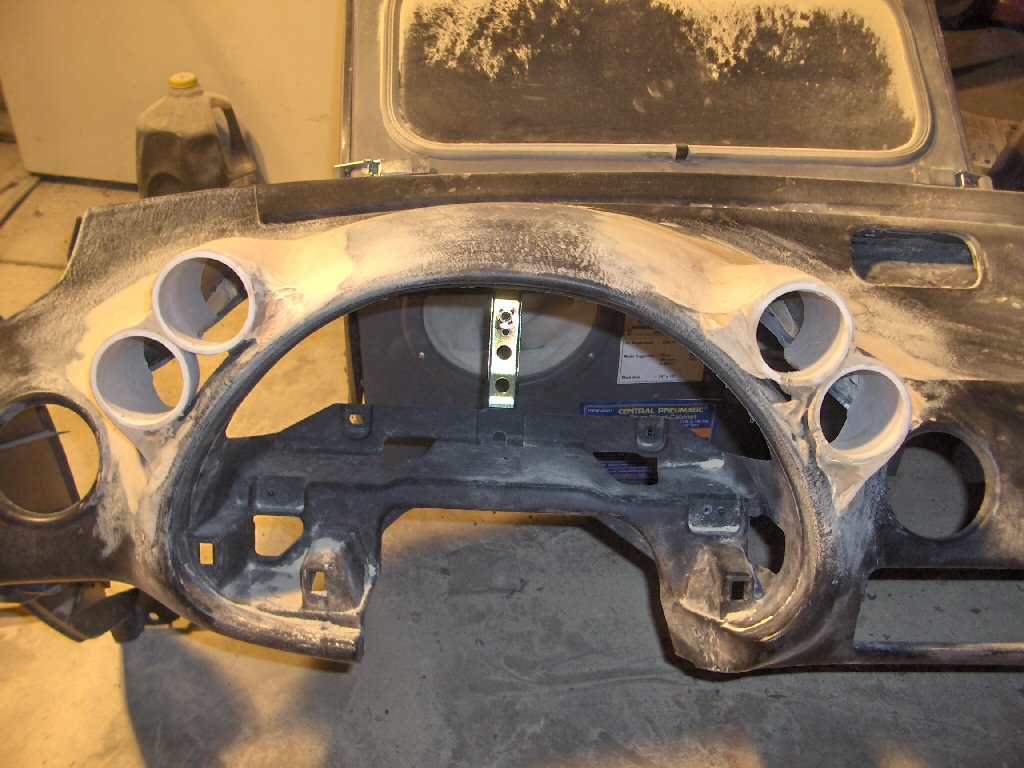
Alright, sanding is finished on the first coat. Time to apply a second coat. My cousin did both sides this time. After all that sanding I wanted this to come out good. Good basically meaning I didn't want to have to do as much sanding this time around. Here are the results. The body filler did cure a little quickly on the left side.
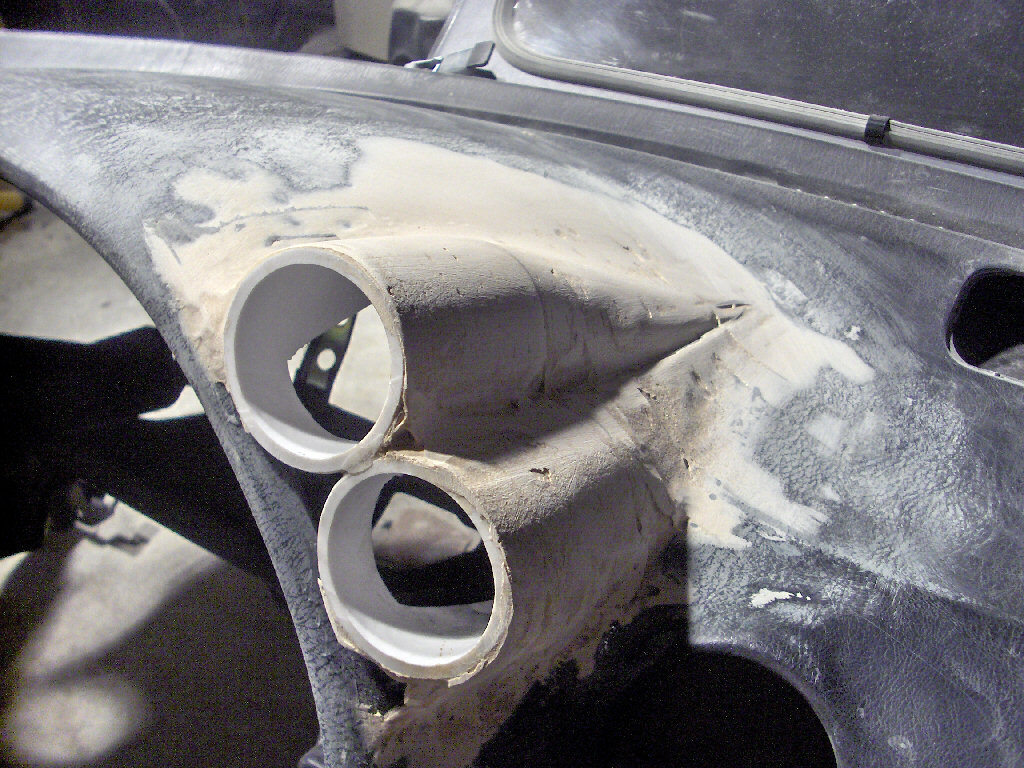
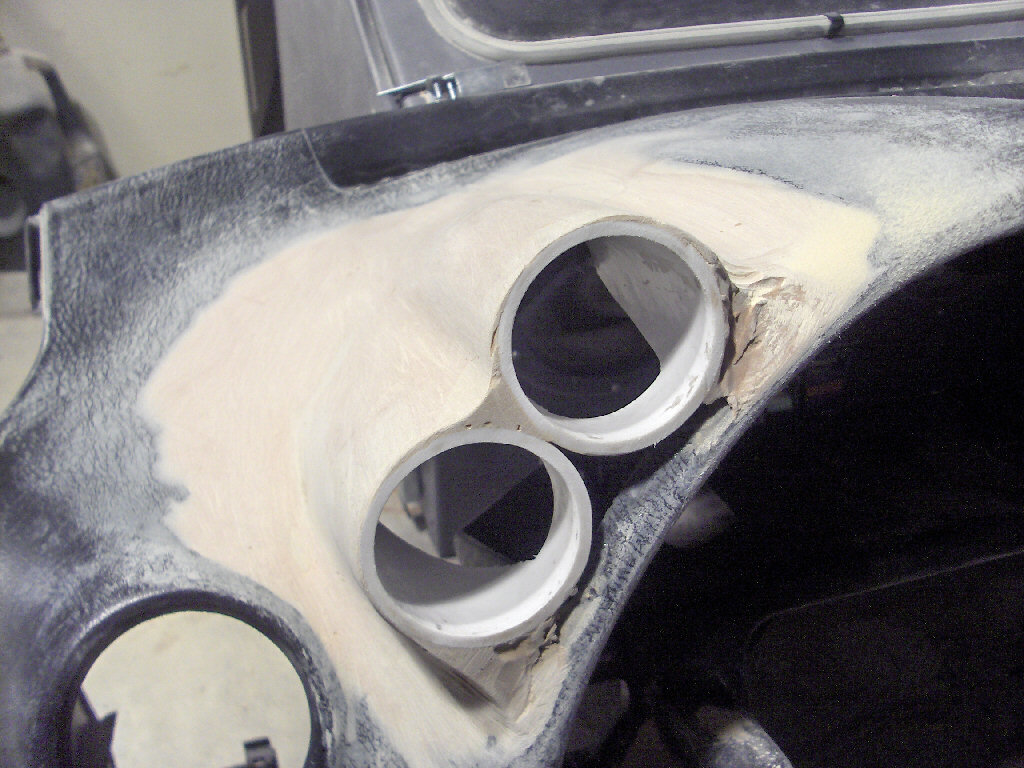
You guessed it, time for more sanding... again. This was all we got done last night. Theres more work to be done. It looks like another coat or so to me. Theres a few places that still need building up and shaping better. Alas, I tire of typing. Here are the pictures of how it currently sits. As you can see its really taking form.
9/15/06
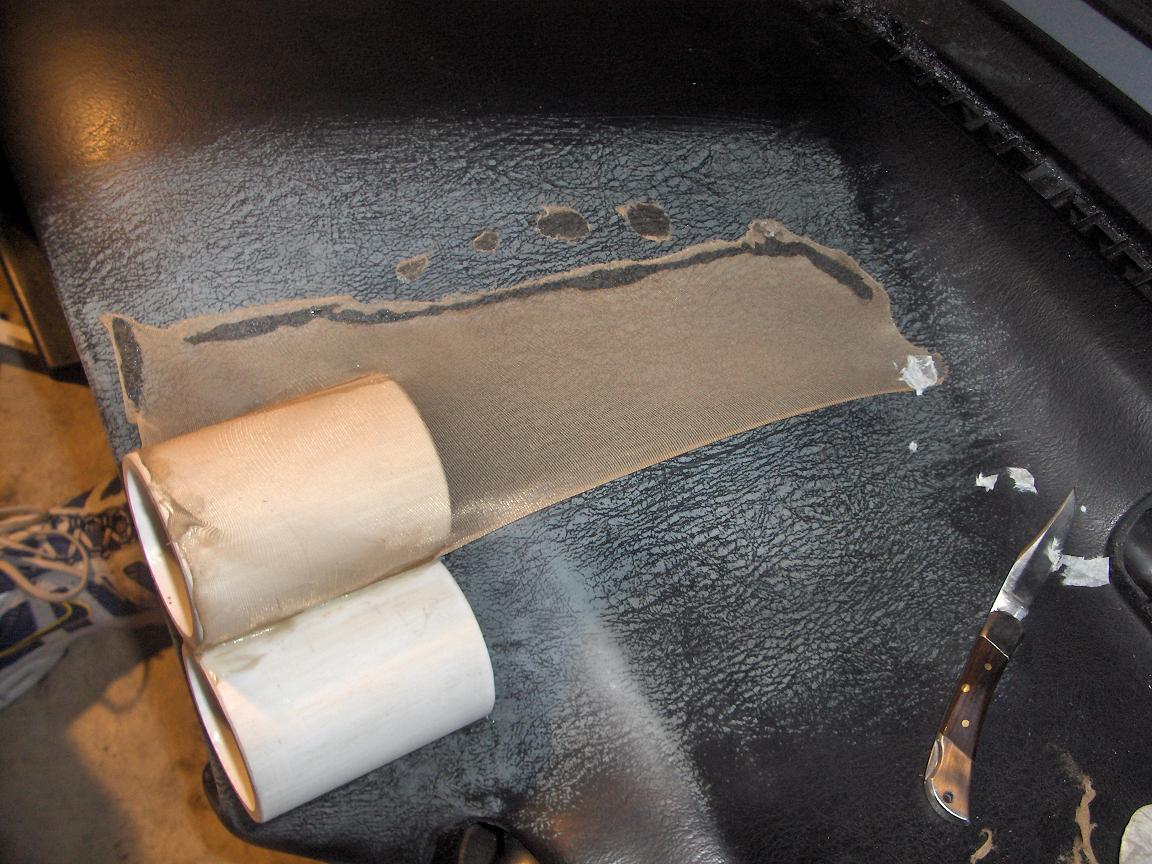
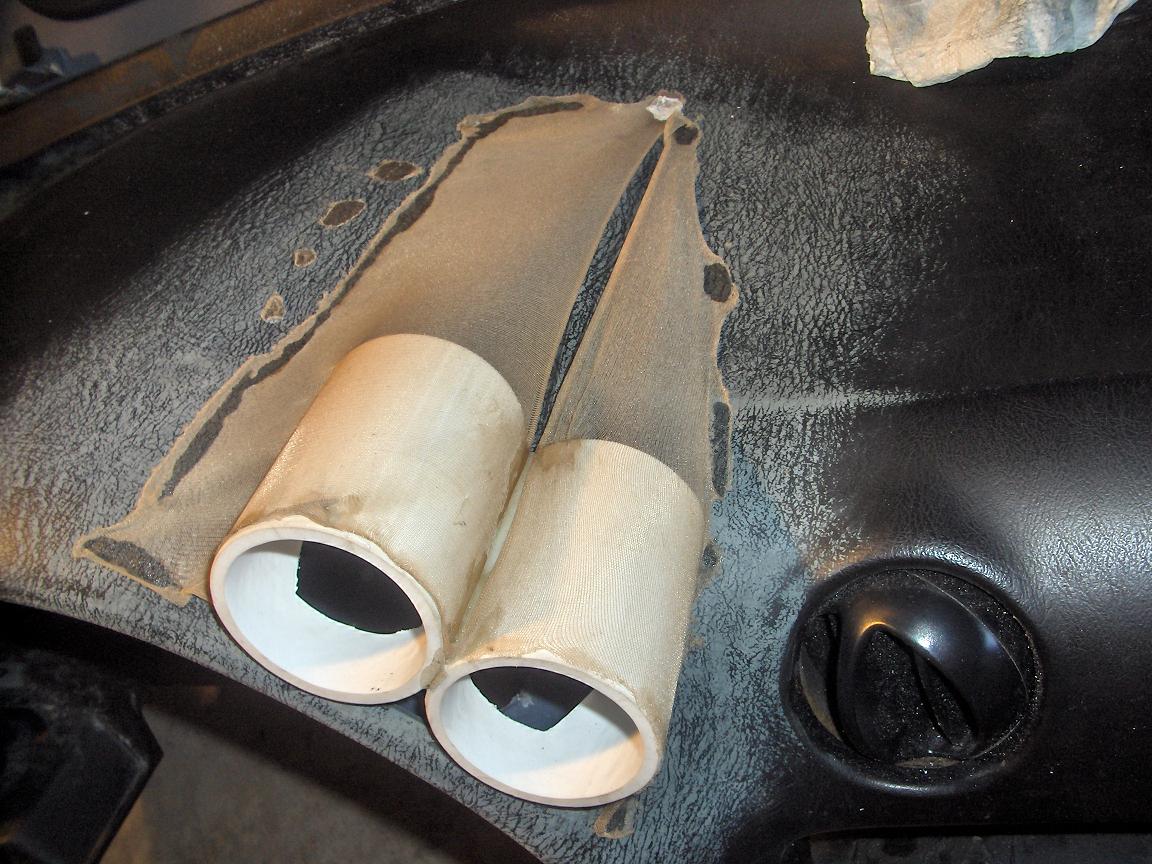
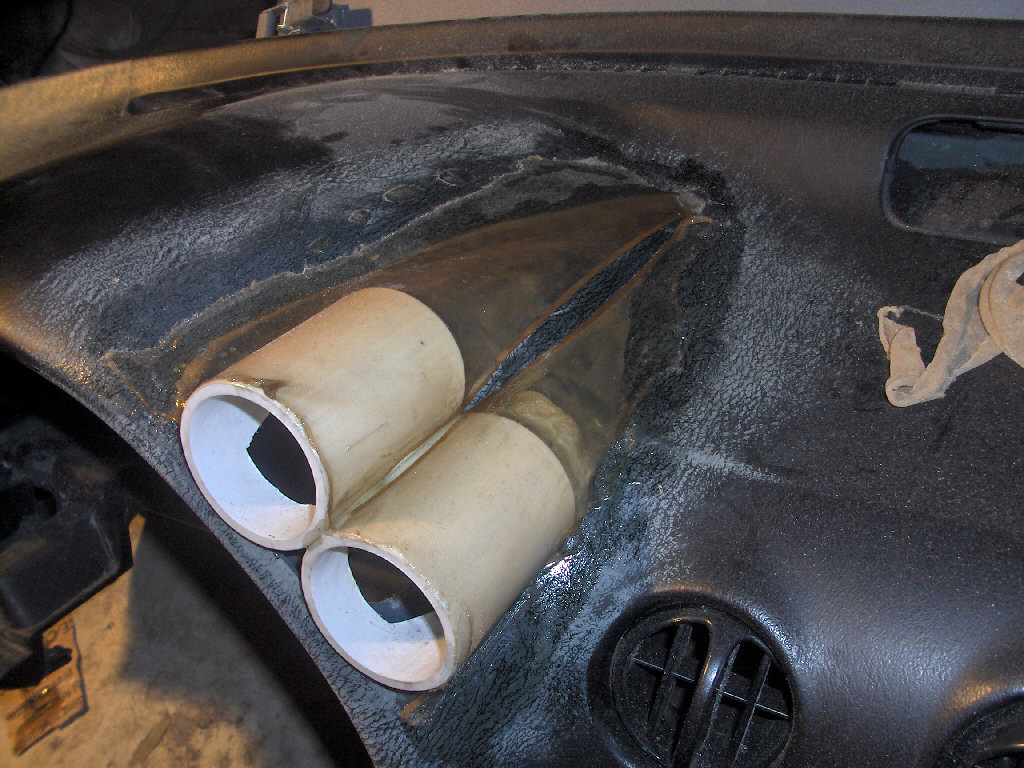
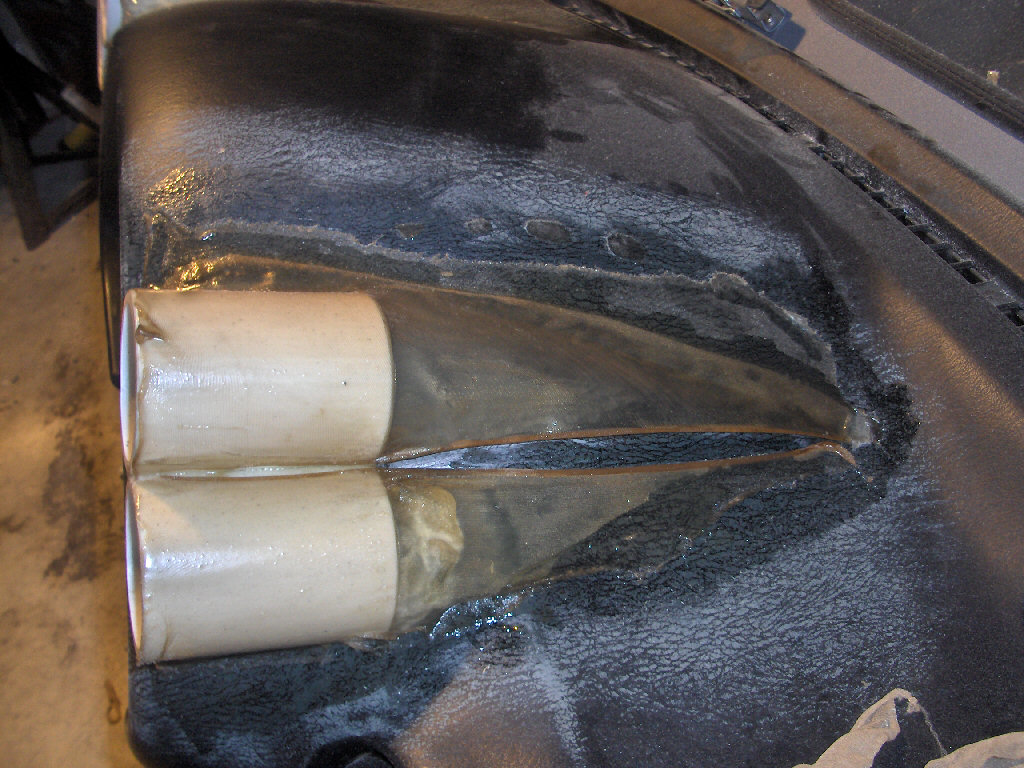
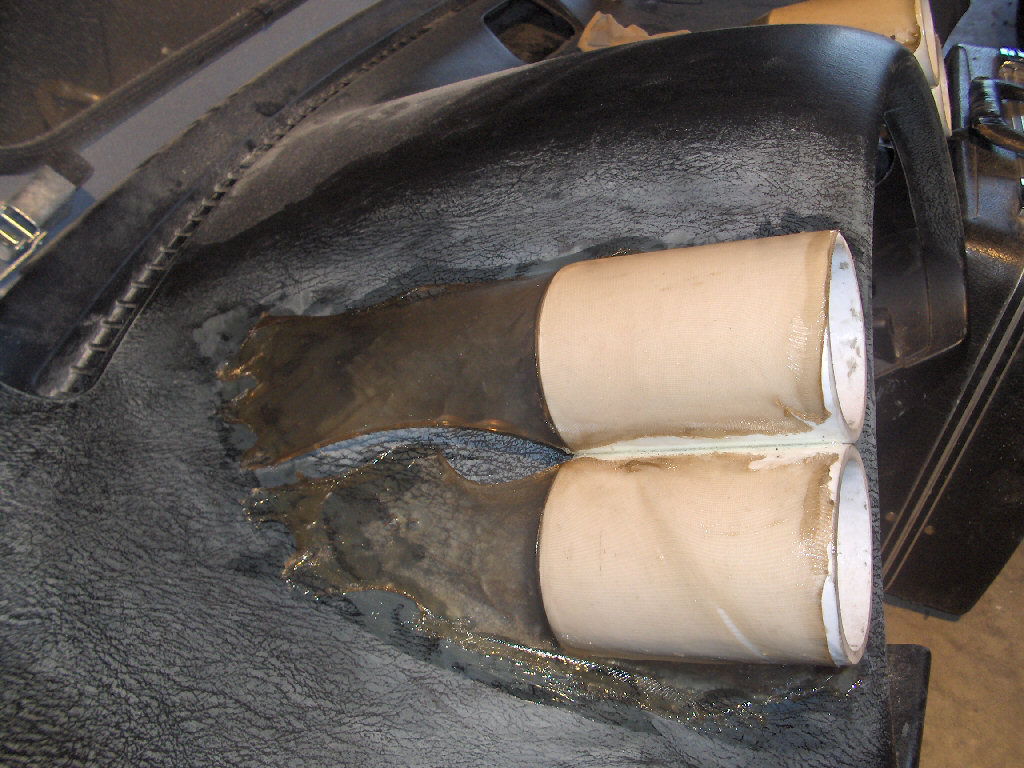
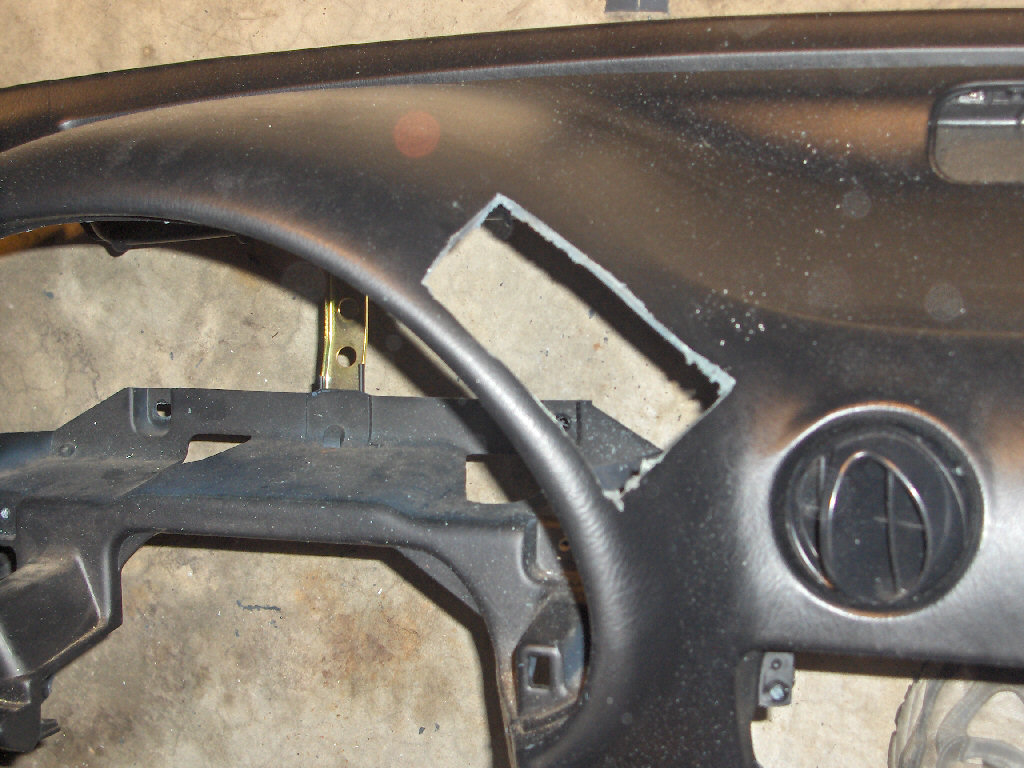
I've made a little headway since the last update, although not a ton. I glued the pipe to the dash securely with epoxy. Then I started laying out the frame with pantyhose. To do this I used another pair of hands donated by my cousin as well as some superglue. This seemed to work out very nice as you can see in the pictures below. We just did one pod at a time to get the dip in the middle. Then we moved to the other side which is a bit different because the dash doen't follow the same contours on both sides.
After we had tacked it all down we mixed up the fiberglass resin and started brushing it on over the fabric. Unfortunately, we didn't mix the resin in the correct proportions and it didn't harden very well. There was also a problem with the left side as the fabric wasn't pulled as tight and tended to sag. In the end I ended up ripping off the left side, sanding it down, and starting over. The right side was treated to a second coat of resin and it hardened up fairly well. Here are the results after the resin was all down and the left side was redone.
8/28/06
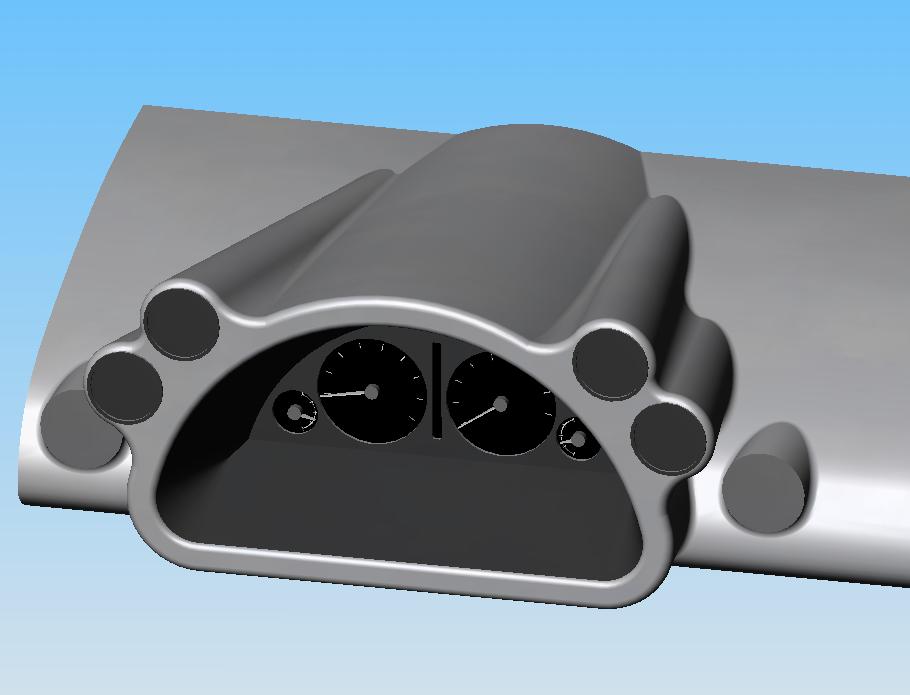
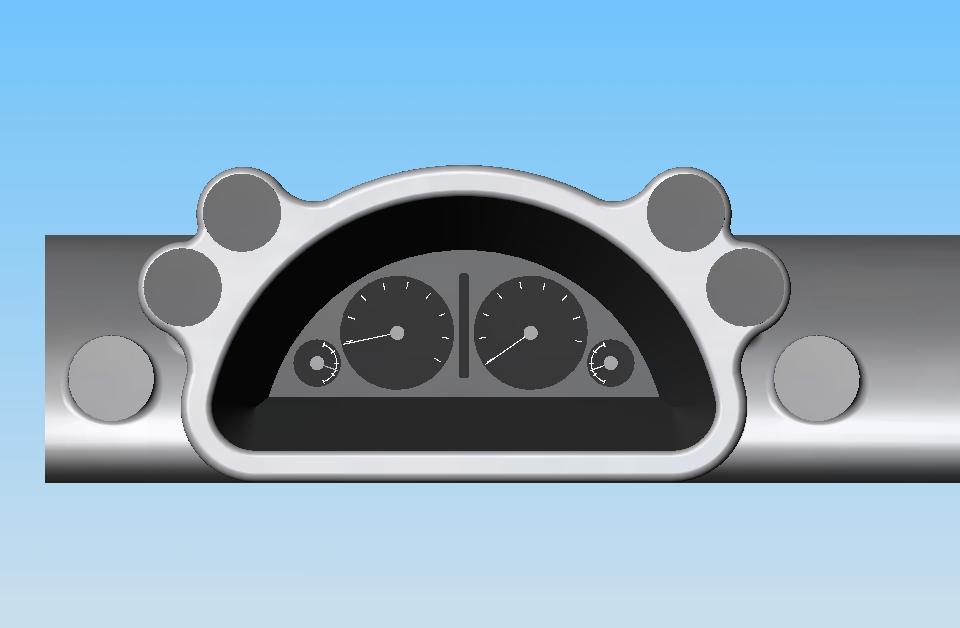
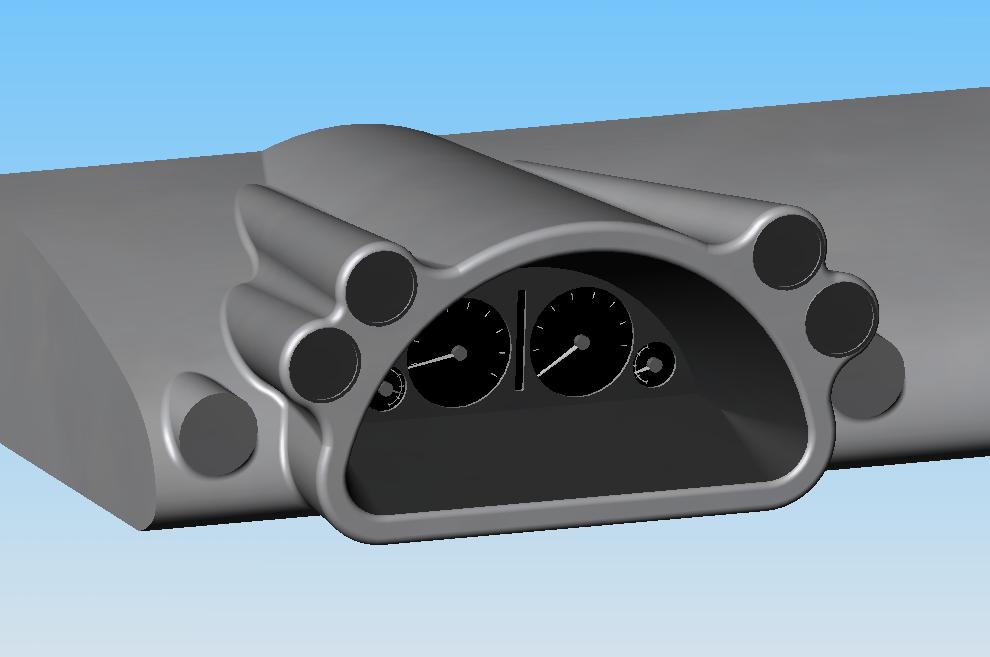
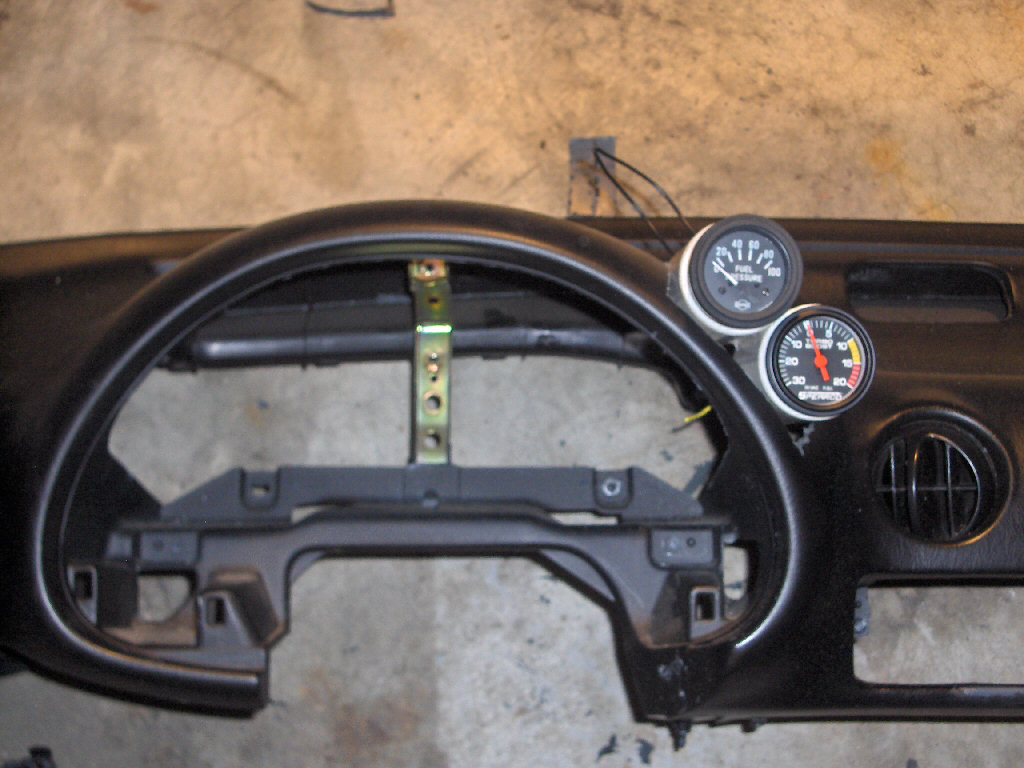
Okay, so... central gauge pods eh? While writing this now, I guess if I were you my first question would be why? I would then answer. Its my style. This is part of the ongoing 3E-ZE build up. The whole cosmetic theme I'm going for on this whole thing is "clean". I don't want a-pillar gauge pods that stand out like a sore thumb. I don't want gauges mounted to the top of my dash with screws and brackets. I want these gauges to be tucked in as much as I can make them. I don't want them to be obviously noticed by passers by. This is my attempt to integrate the aftermarket gagues into the factory dash and make it as clean as I can, and somewhat styleish.
Now that thats out of the way, how do we start this crazy project? Well, I personally started by sketching some stuff up. Most people would do this on paper and thats not a bad way at all. But, since I'm a professional drafter I decided to draw up what I wanted in CAD. This gives a much more full visual appearance and is something much easier to work off of. I can rotate it around and see if I think it'll look good in a 3d environment. Not to mention I can size things fairly close to what they will actually be. This is what I came up with. The 3d model can be had here.
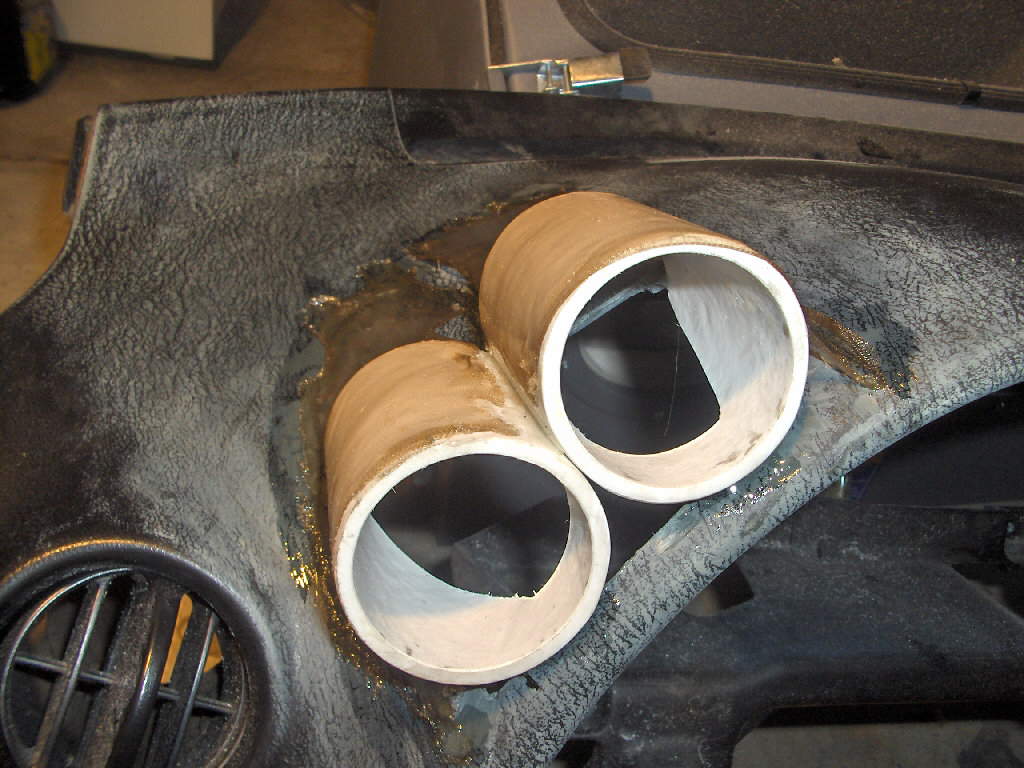
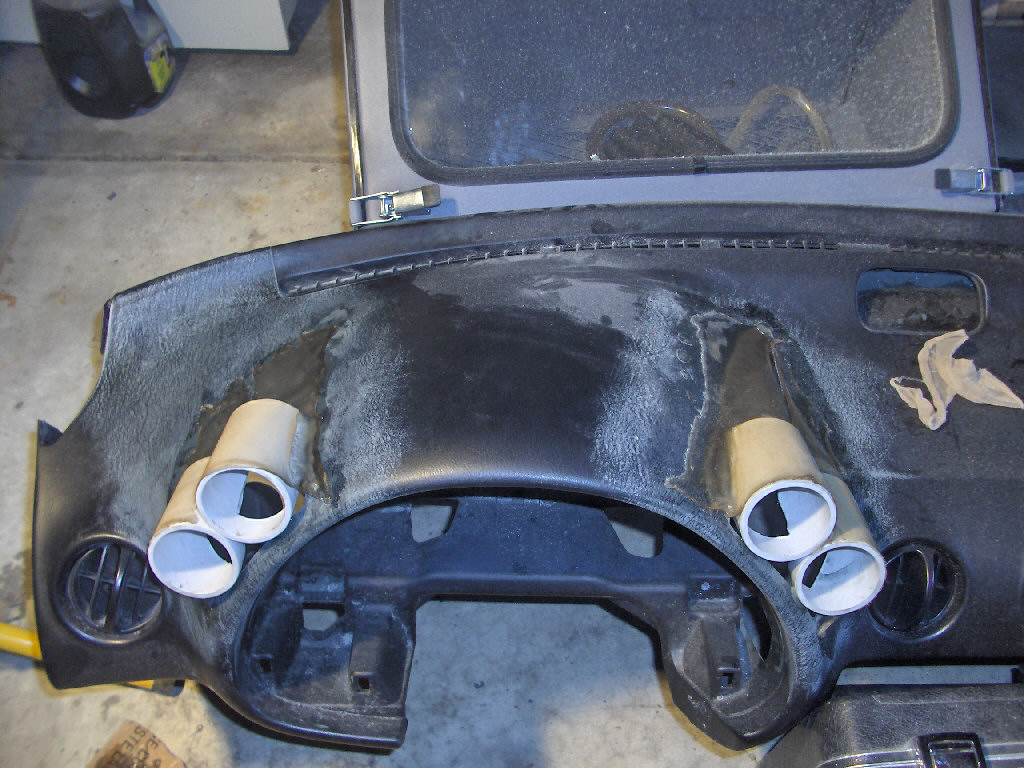
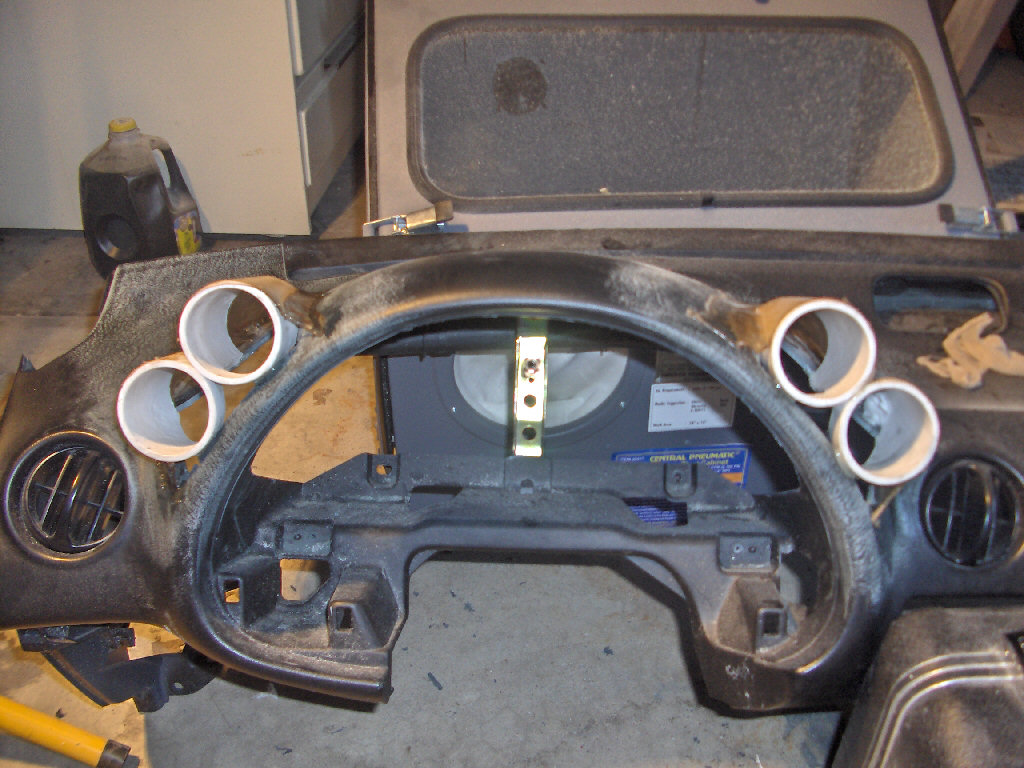
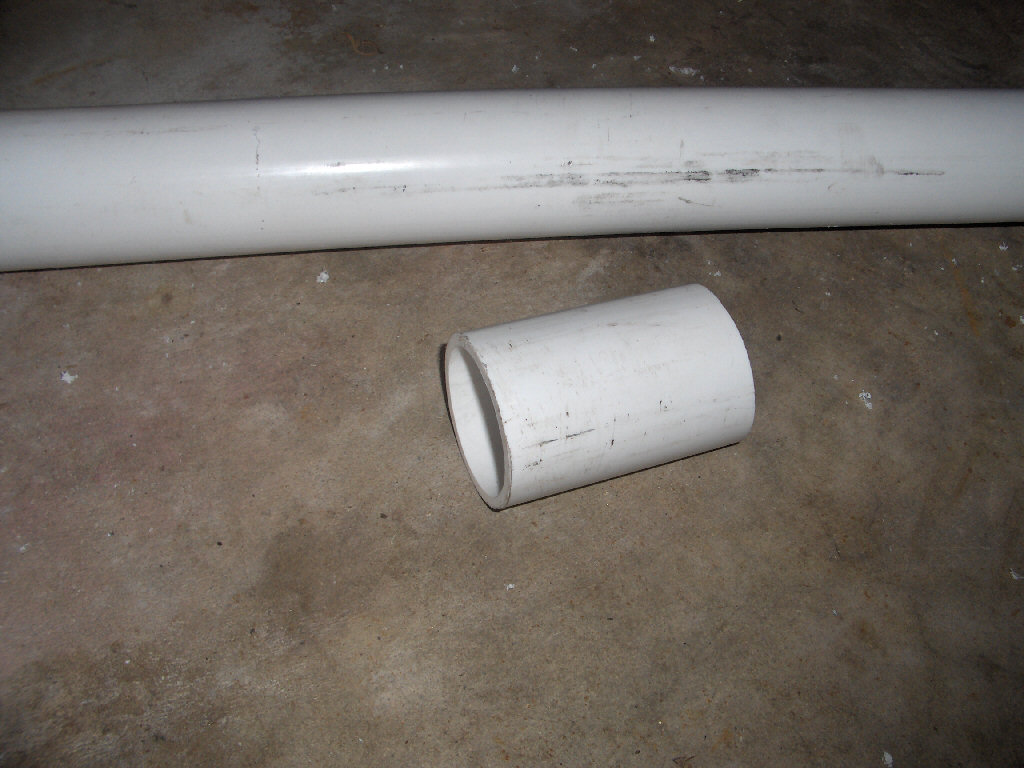
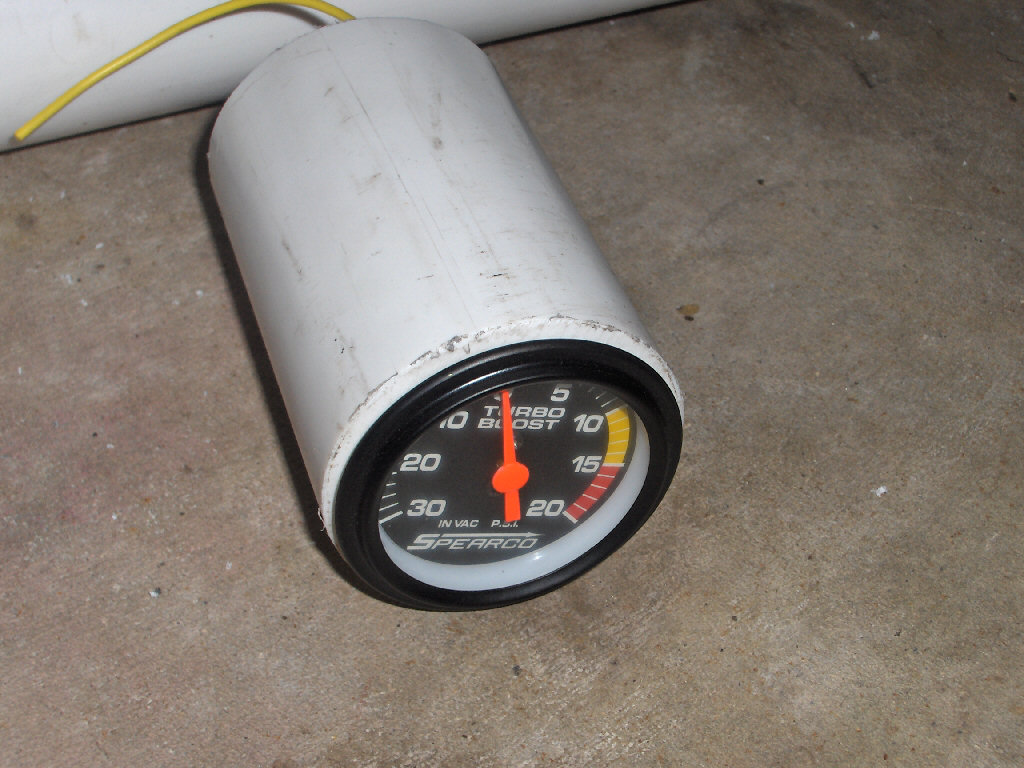
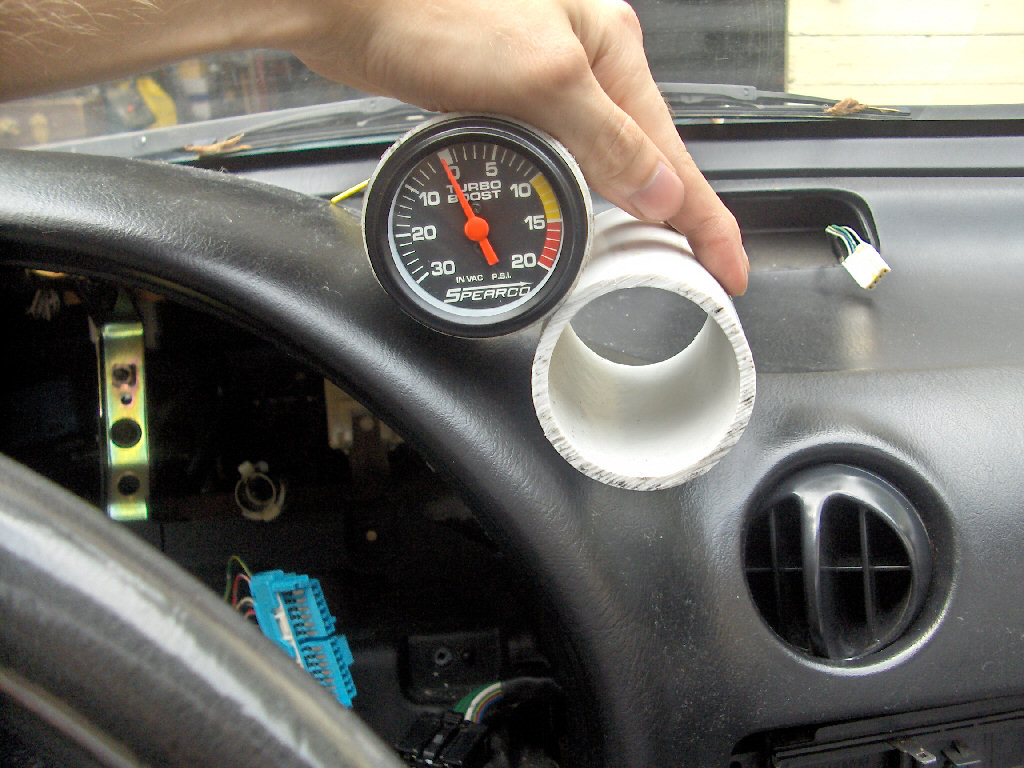
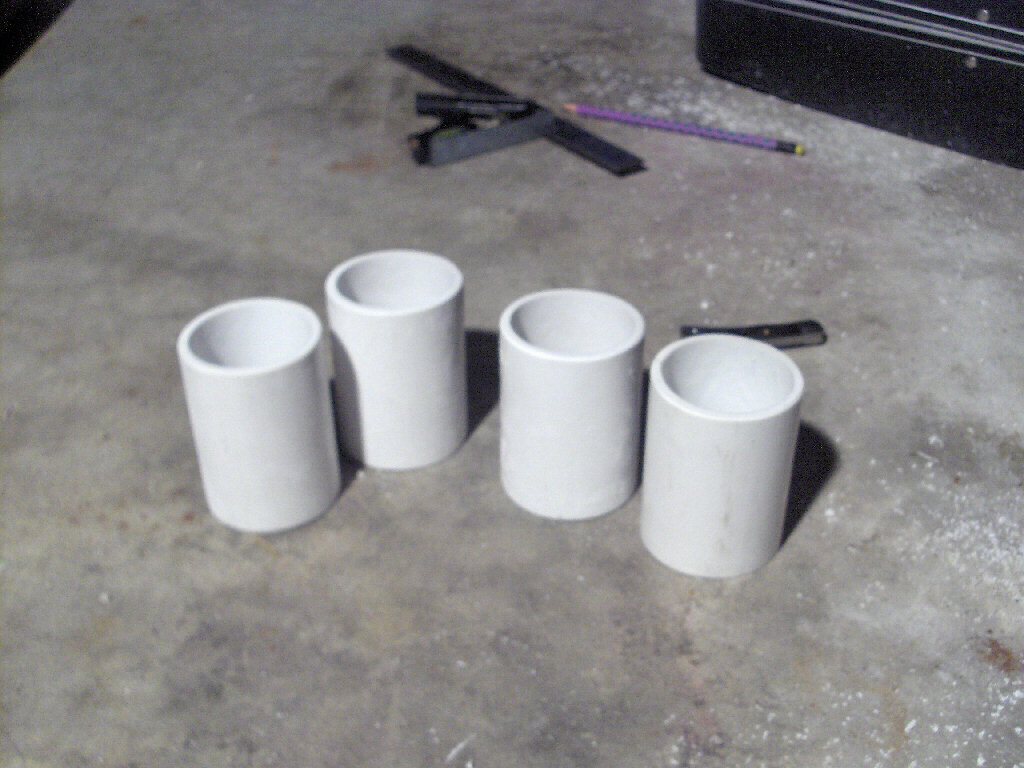
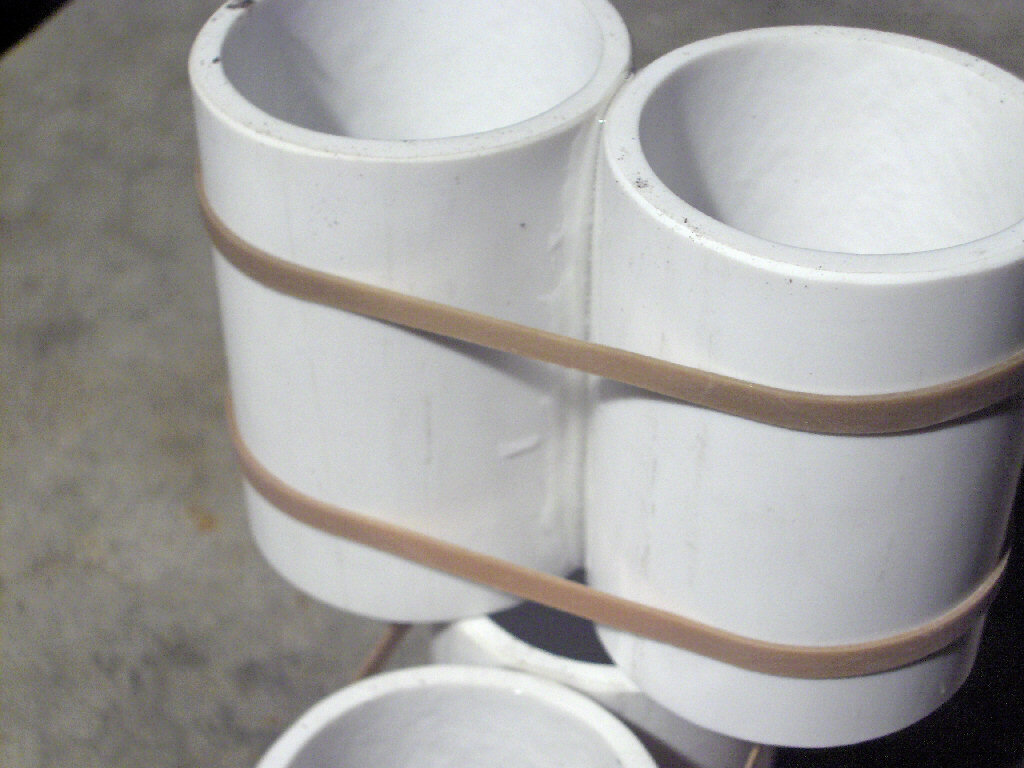
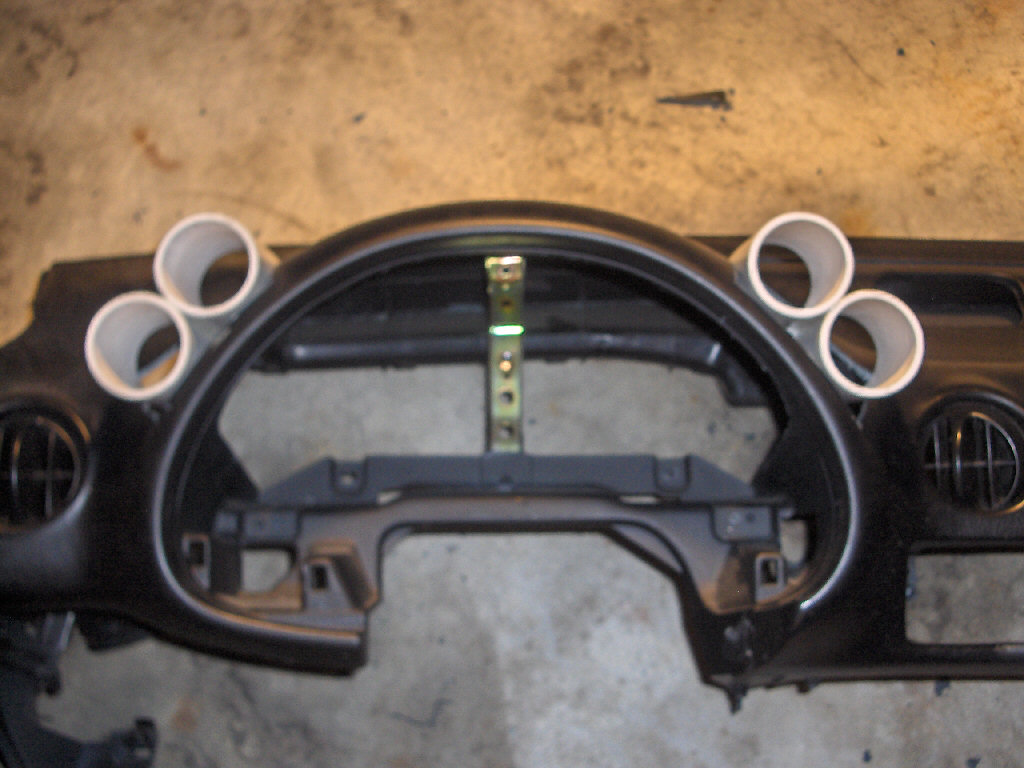
Alright, now I have a rough idea of what I want. On to the next step. How am I going to make this? Well the first thought that came to mind was fiberglass. Its structurally solid and moldable. So, after consulting some people I know on and offline I was informed that I would need to make a frame. Mind you I have never done fiberglass work before so this is totally new to me. My first concern now was what can I use to put the gauge in? I know they're made to mount to a flat surface so creating a flat front with room on the sides for the brackets sounded like an okay idea. However, I really didn't like the idea of having to jam my fingers up the backside of the dash just to tighten them. So, while making a supply run with my cousin one day to get fiberglass and body filler we found out 2" ID pvc pipe works amazingly well for press fitting 2 1/6" gauges into. So I picked up a 6' cut and brought it home. With that found out the project seemed quite a bit easier. I cut some pieces to see what it might look like once mounted.
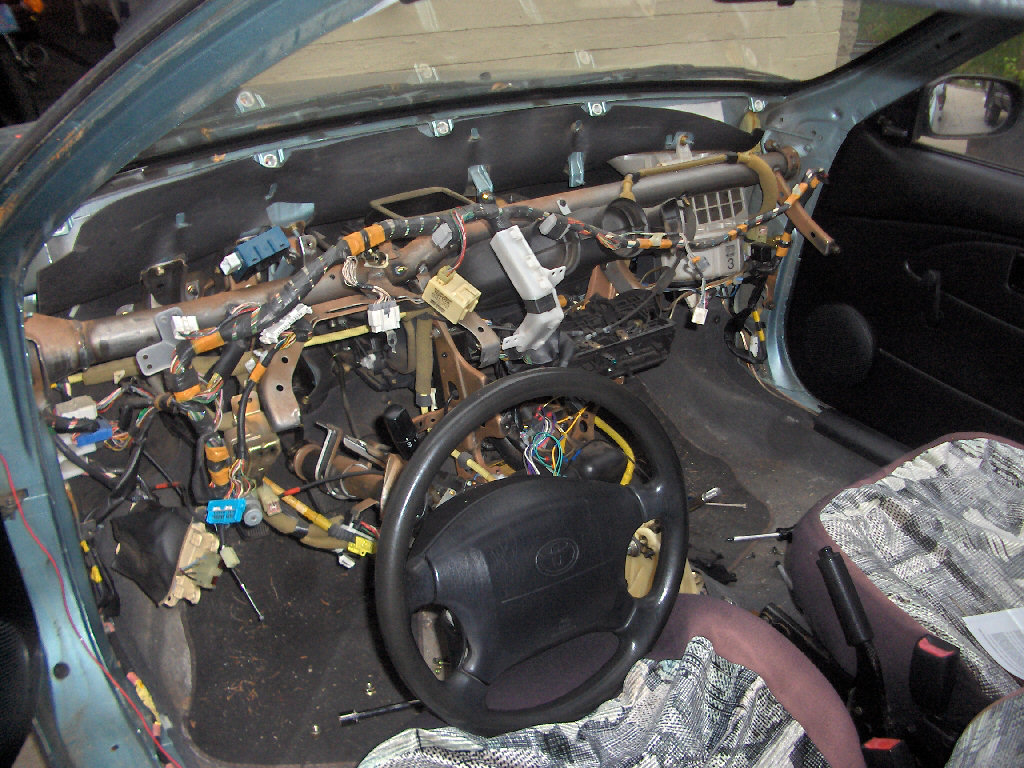
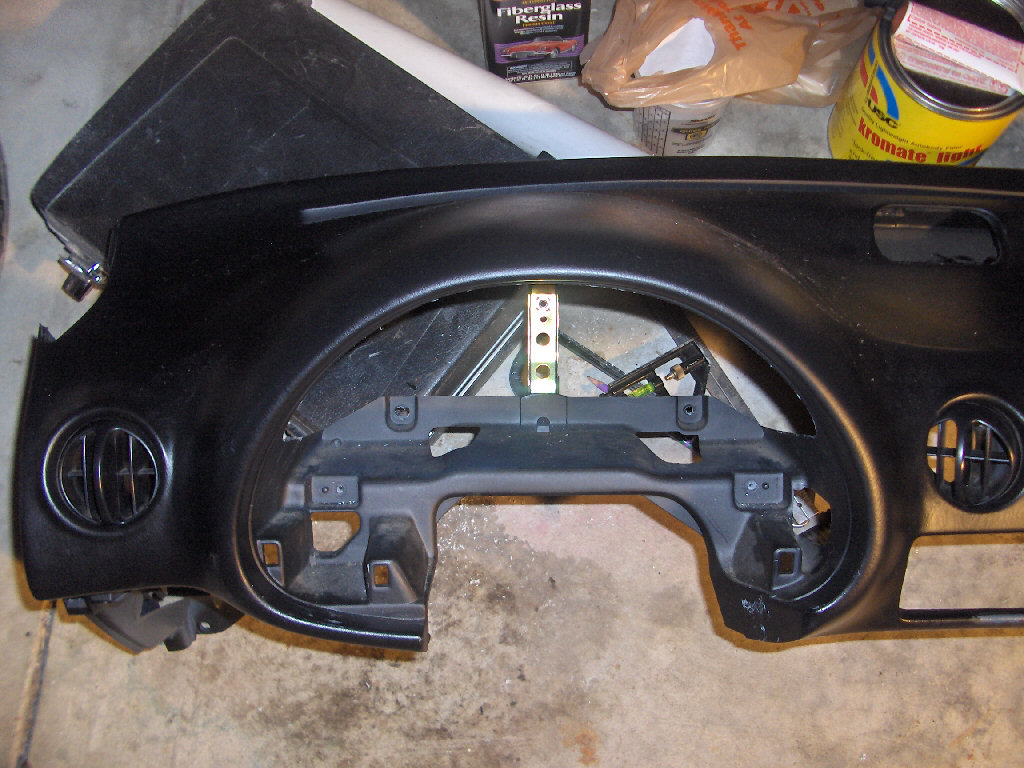
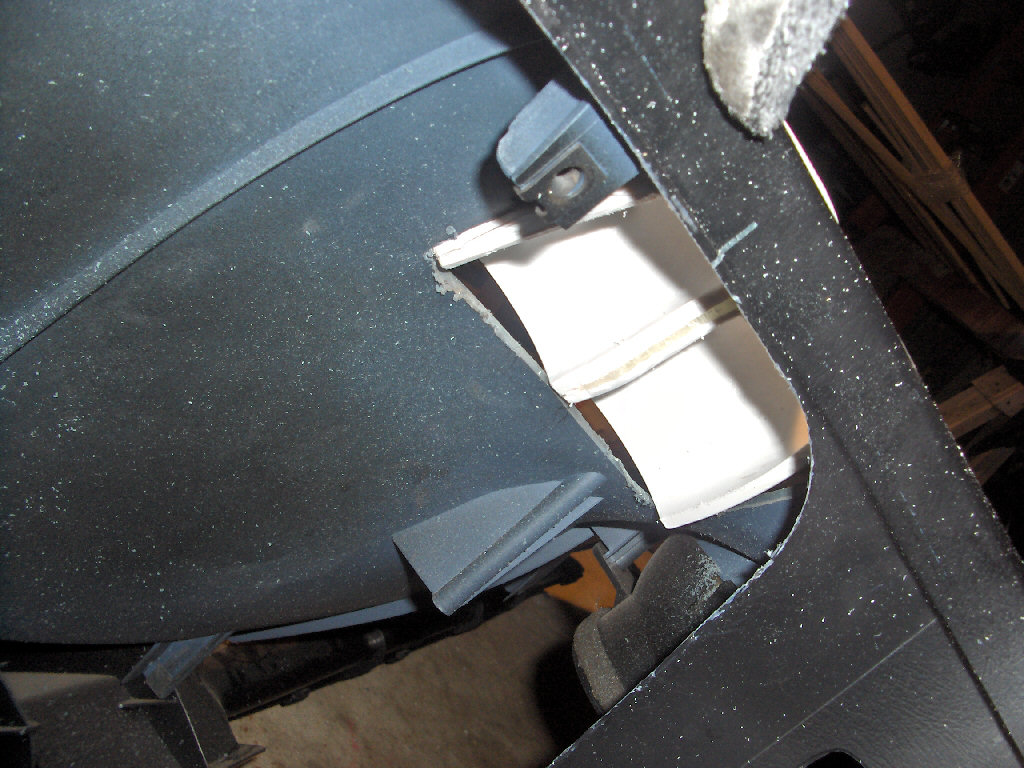
So now I'm thinking this is a piece of cake. I got most of it figured out now. Lets throw it all together! Well, I was wrong. First I had to take out the dash. To do this is requires quite a bit of disassembly of the interior. In any case I set out and did this. Here are some pics of the process and how the car looks like now.
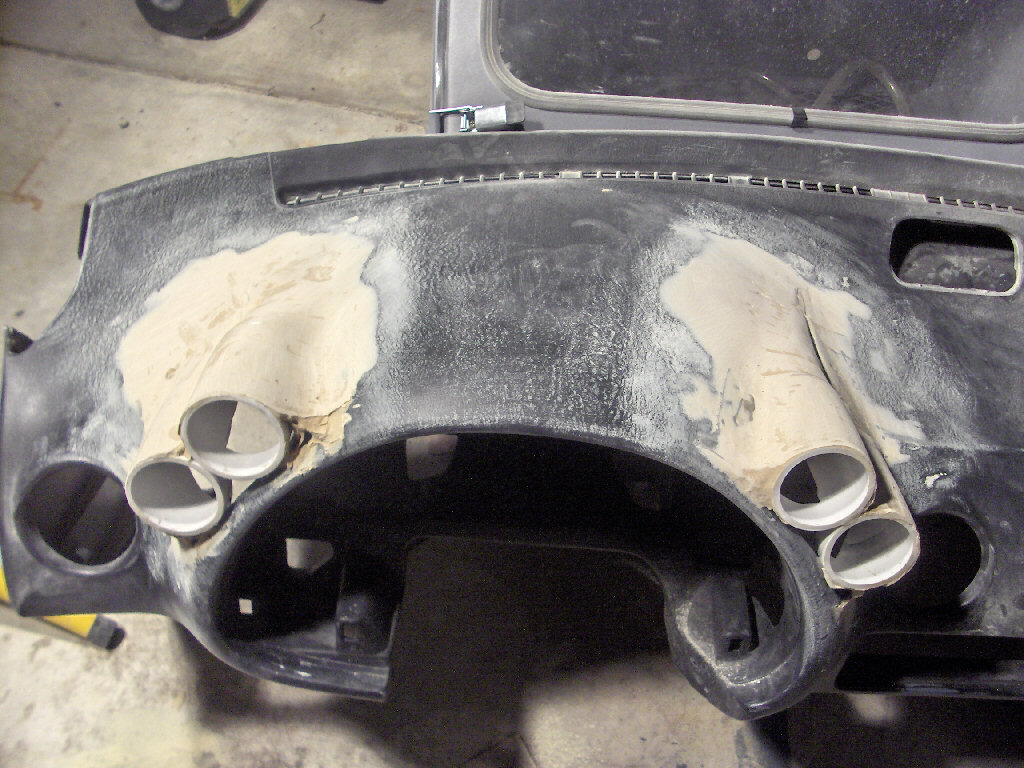
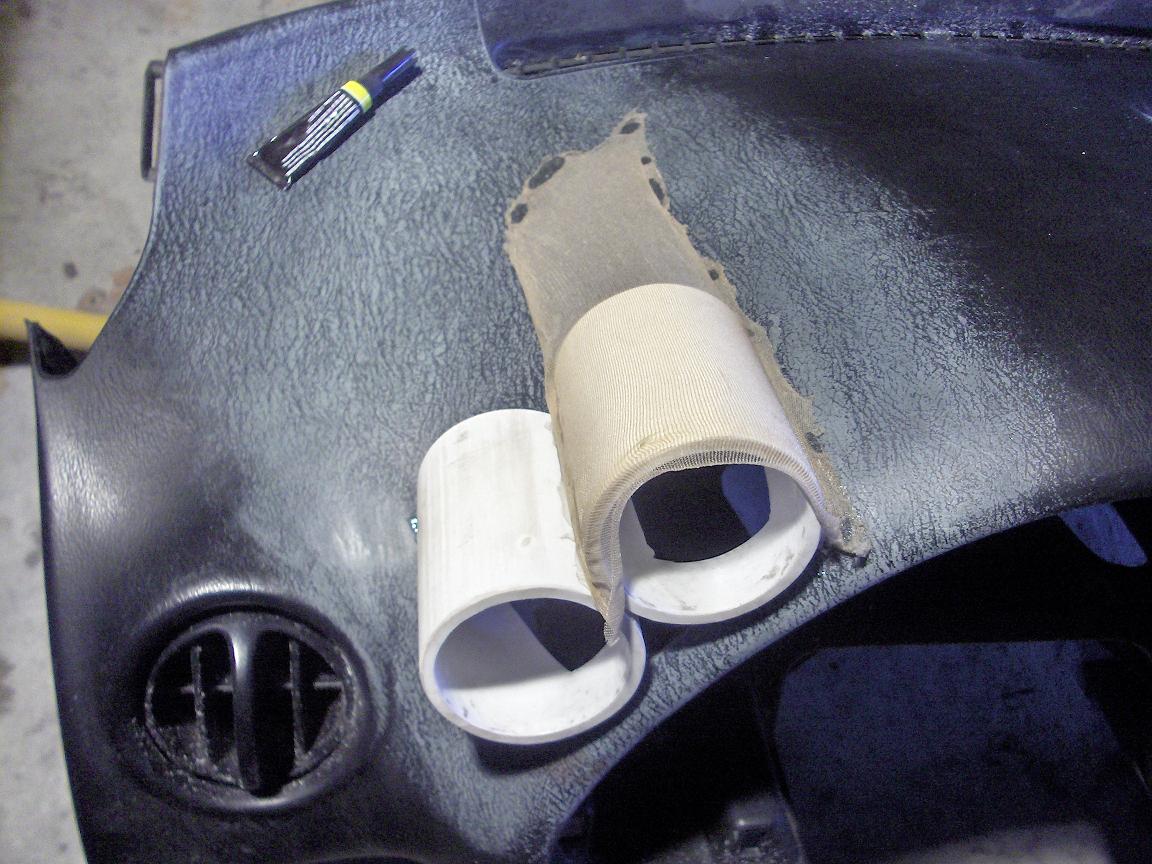
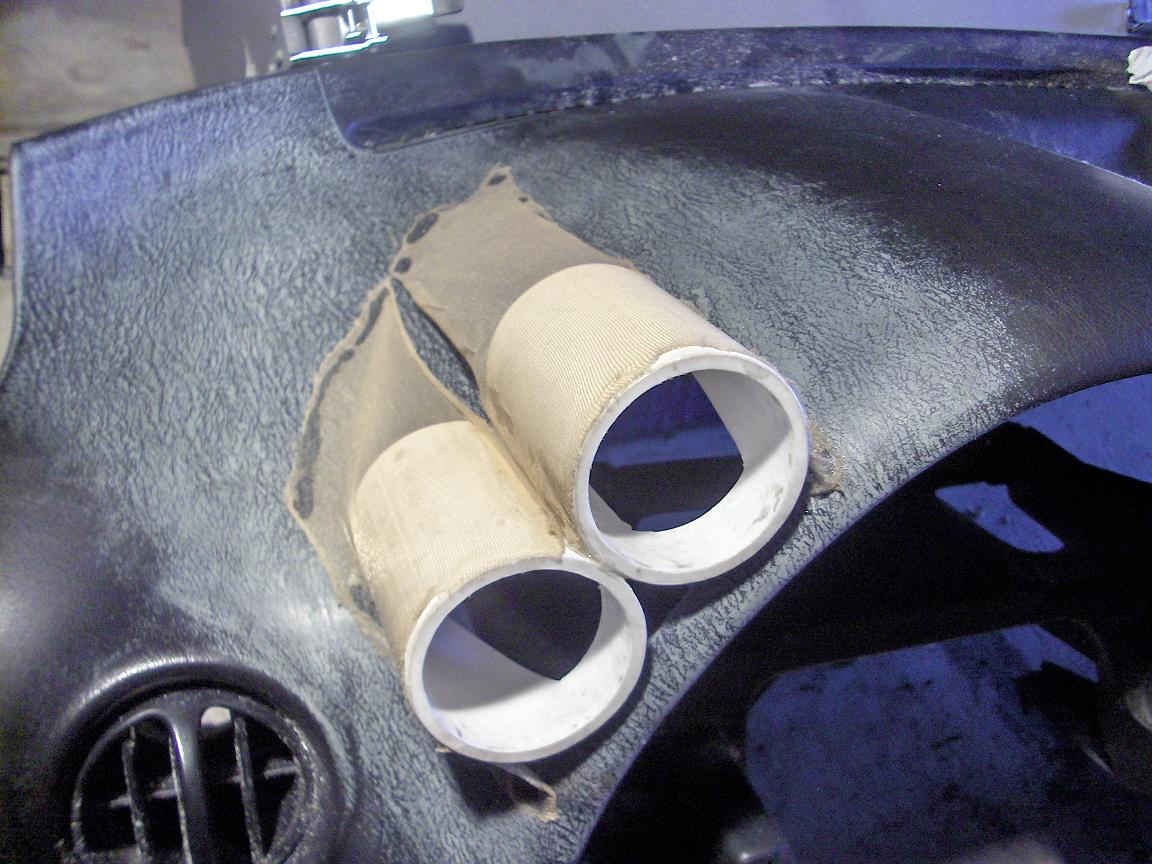
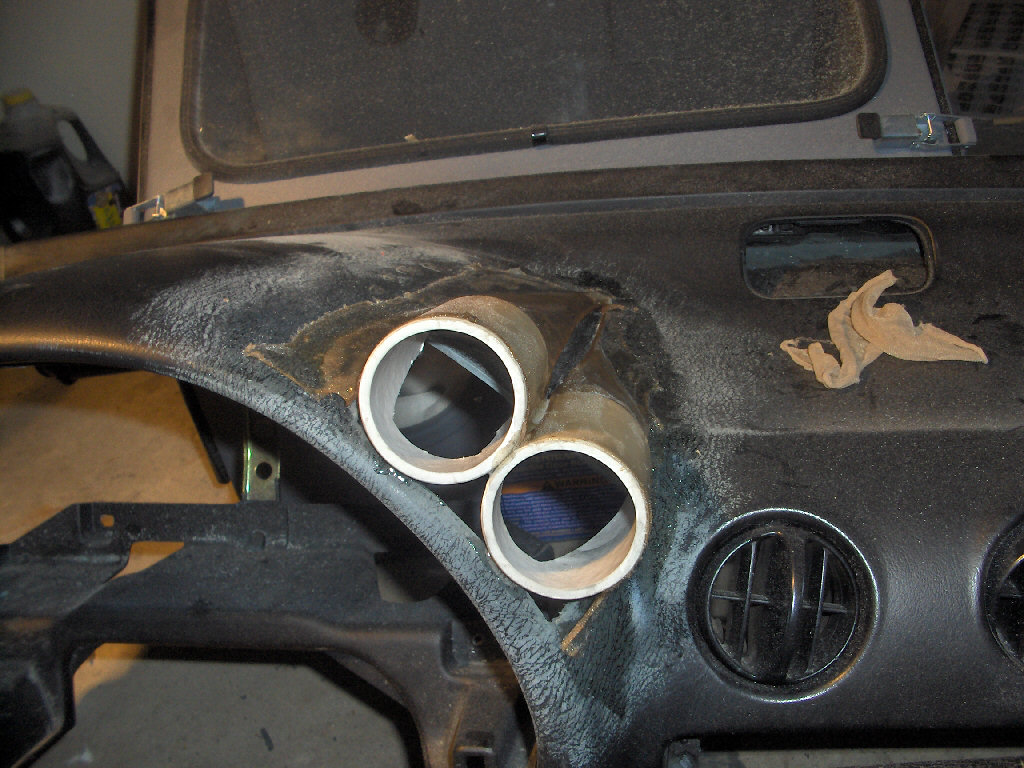
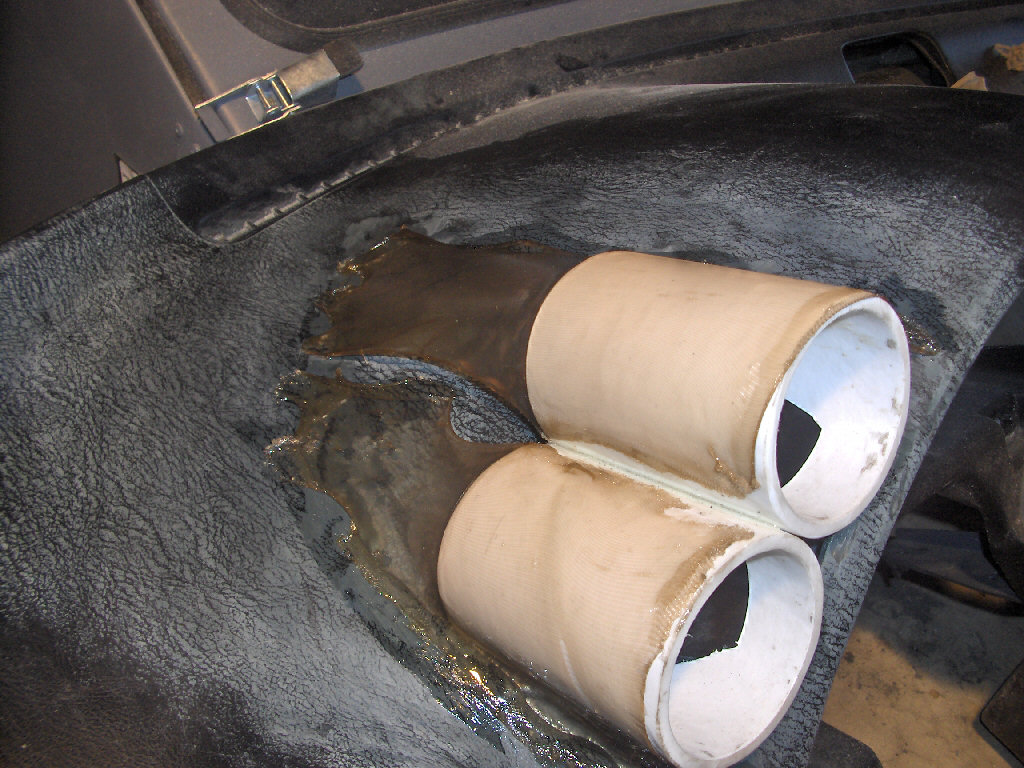
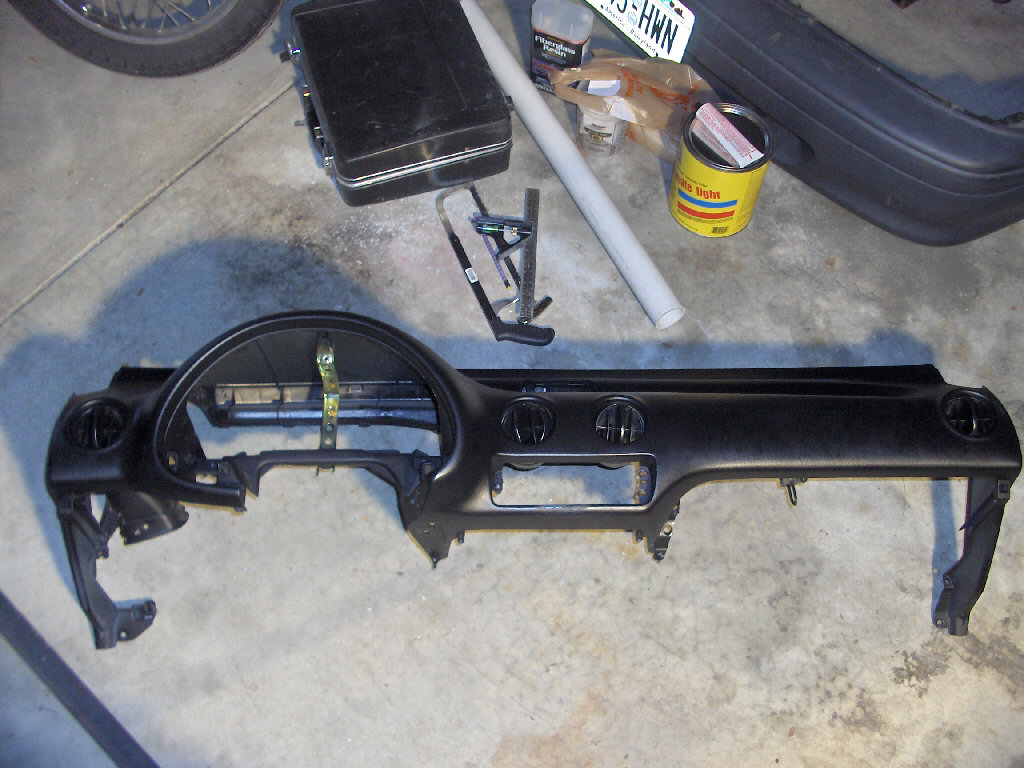
With the dash out of the car I could then easily cut the holes for the pipes to sit in. I ended up gluing two pipes together to make the form for each side. I then marked up the dash with a pencil and started cutting. I was a bit nervous doing this as I certainly didn't want to have to get a new dash anytime soon. So I cut conservatively and everything went surprisingly well. Lots of small cuts and test fitting is the way to go. After I got both sides cut out I then marked the tubes from the inside of the dash to cut them out so they will be flush with the inside of the dash. These are the results.