BACK
5th Generation (95+) Paseo Instrument Cluster Swap
Written by: Alfradio
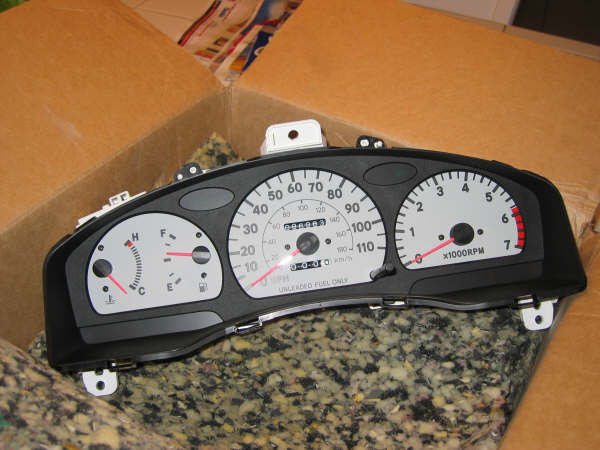
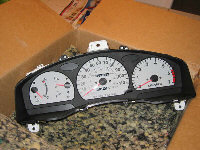
An eBay victory!!! ($100+$15 shipping ) The cluster had been sitting at $15 all week and then, with only 8 minutes remaining, someone ran the price up to $100 before giving up... (Damn!) I don't even think it was a sniper... Just a bit suspicious about the SELLER seeing the cheap price ($15 with 8 minutes to go) and resurrecting an old user ID and just jacking it up.... I mean the guy who was bidding hadn't bid for 10 months and then from outta nowhere he's bidding on a Paseo instrument cluster???? I dunno! But, happy I won it and at a relativley reasonable price!!! Ooooooooooooo... it looks so pretty!!!! Mmmmmmmmmm... look at that tachometer.... let me gaze upon it face(s) Ooooooooooooooo!
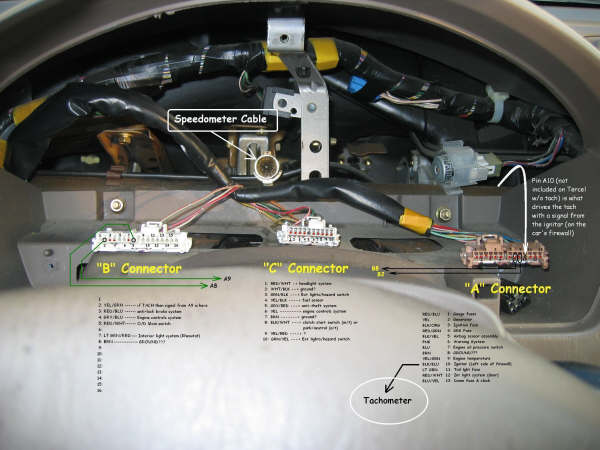
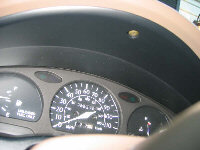
That one little screw holds (what I call) the INSTRUMENT PANEL BEZEL in place. Unscrew it, and gently pry the bezel loose. Before being able to totally remove the bezel, you will have to disconnect the window defroster switch. Once that's done, set the bezel and the switch aside (careful you don't lose the screw). NOW comes the hardest part of the swap... Once you've undone the three screws holding the cluster in place (or before, it doesn't really matter) reach in behind the cluster and 'feel' your way around for the speedometer cable... The cable is secured to the cluster by a little teflon clip... PATIENCE! While squeezing the clip, pull out... Eventually the cable will come FREE! Key word is: PATIENCE! * * * * Now, disconnect the 3 electrical connectors and carefully remove the cluster from the dashboard (this, for some reason, was like Rubicks Cube everytime I did it but, again, PATIENCE!)
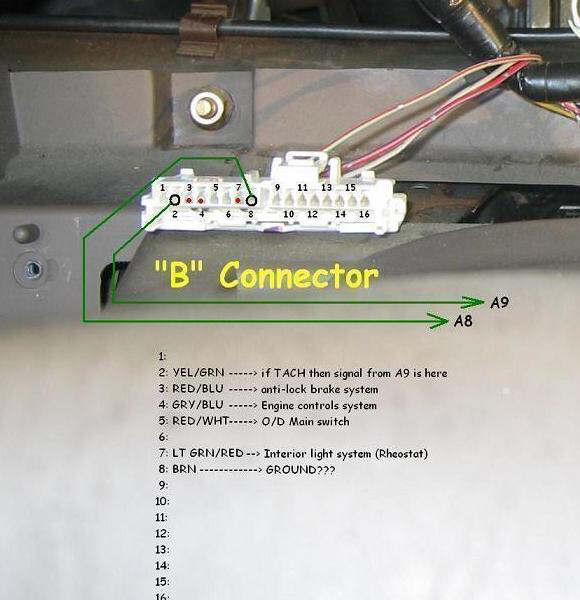
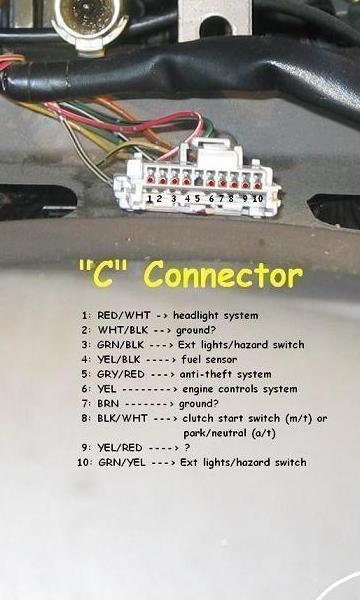
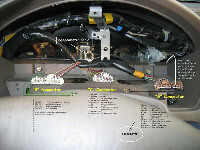
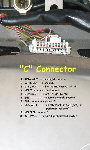
With the most difficult part of the swap now behind you, arrange the connectors like the picture below and just marvel at how much you've accomplished... from all the gymnastics required to undo the speedometer cable, you're probably limber enough to pat your self on the back.... Go ahead, do it, (pat-pat-pat-pat) OKAY!! back to work! * * * * The next 3 photos detail the 3 connectors' pin outs... Believe it or not, you're almost done!
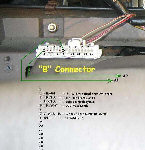
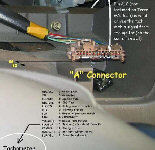
The '96 Paseo cluster moved into a 1997 Tercel results in NO temp gauge READING because with the stock Tercel cluster, the gauge is on the cluster's right side (in front of the "A" connector). The Tercel temp gauge is 'powered' by pins 8 and 9 of the "A" connector. * * * The Paseo temp gauge (in its natural habitat, on the LEFT side, in front of the "B" connector) was "powered" by pins B2 and B8 but, those pins are MISSING from the Tercel's "B" connector. * * * There are 2 possible fixes: FIX "A": If you DON'T intend putting the Tercel cluster back: Move the wire (and contacts) from A8 to B8 and A9 to B2 * * * FIX "B": If you DO Intend to replace Tercel cluster: Find a length of wire onto which you crimp contacts which will fit into the "B" connector and tie the other end to the respective wires on the "A" connector. By tying pins A8 to B8 and A9 to B2, no matter which cluster you put in, the temp gauge WILL WORK!
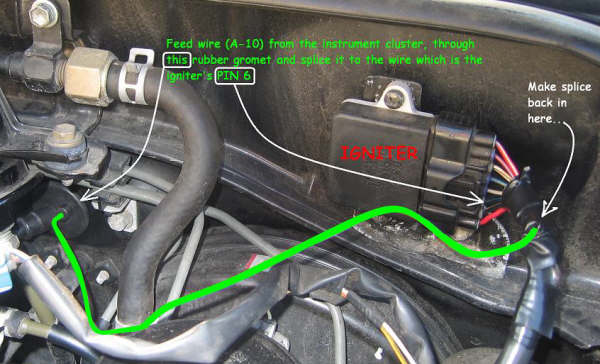
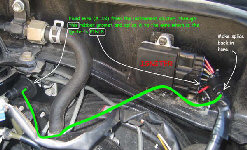
Examine the type of wire contacts used in the connectors and get a few from Radio Shack or a Toyota dealer and crimp it onto a 5 foot length of wire... slide the newly crimped contact into the missing A10 slot (this "powers" the tach) and feed the other end of the wire down behind the dash and through the rubber boot/gromet by the throttle cable. It's best to loosen the boot from the firewall, and then working in the engine compartment, put a tiny hole in the 'nipple' (see next photo) and pull the wire through using small needle nose pliers....
Once you've pulled the A10 wire into the engine compartment through the 'nipple', put the rubber boot/gromet back in the firewall (excersice PATIENCE... this can be a BITCH) Leaving a little slack in the A10 wire, attach (splice) it to PIN 6 of the igniter and YOU ARE DONE!!!!
BACK